Light up goggles
These goggles are a lot of fun. I wouldn't recommend wearing them for anything like.. walking or cycling or moving in anyway! Your vision is definitely obstructed! Think of them as a sit down party costume :D
I attach them to a bowler hat cause it gives you somewhere to mount the micro:bit. Here's the Hubster modelling them in a Mad Hatter's costume
Equipment
- micro:bit
- Kitronik ZIP circle * 2 https://www.kitronik.co.uk/35135-zip-circle-12-zip-leds.html
- 6 pins
- Female to female jumper wires * 6
- Male to female jumper wires * 6
- Goggles (I got mine on Ebay with a hat: https://ebay.us/UpkhAv)
- Edge Connector
- micro:bit battery pack with batteries (or the bat:bit)
Build
- The ZIP circles need pins soldering onto them. You can buy some of the Zip range with pins already soldered on but not 2 circles together: https://www.kitronik.co.uk/5603-zip-zip-leds-add-on-pack-for-kitronik-inventors-kit-for-microbit.html
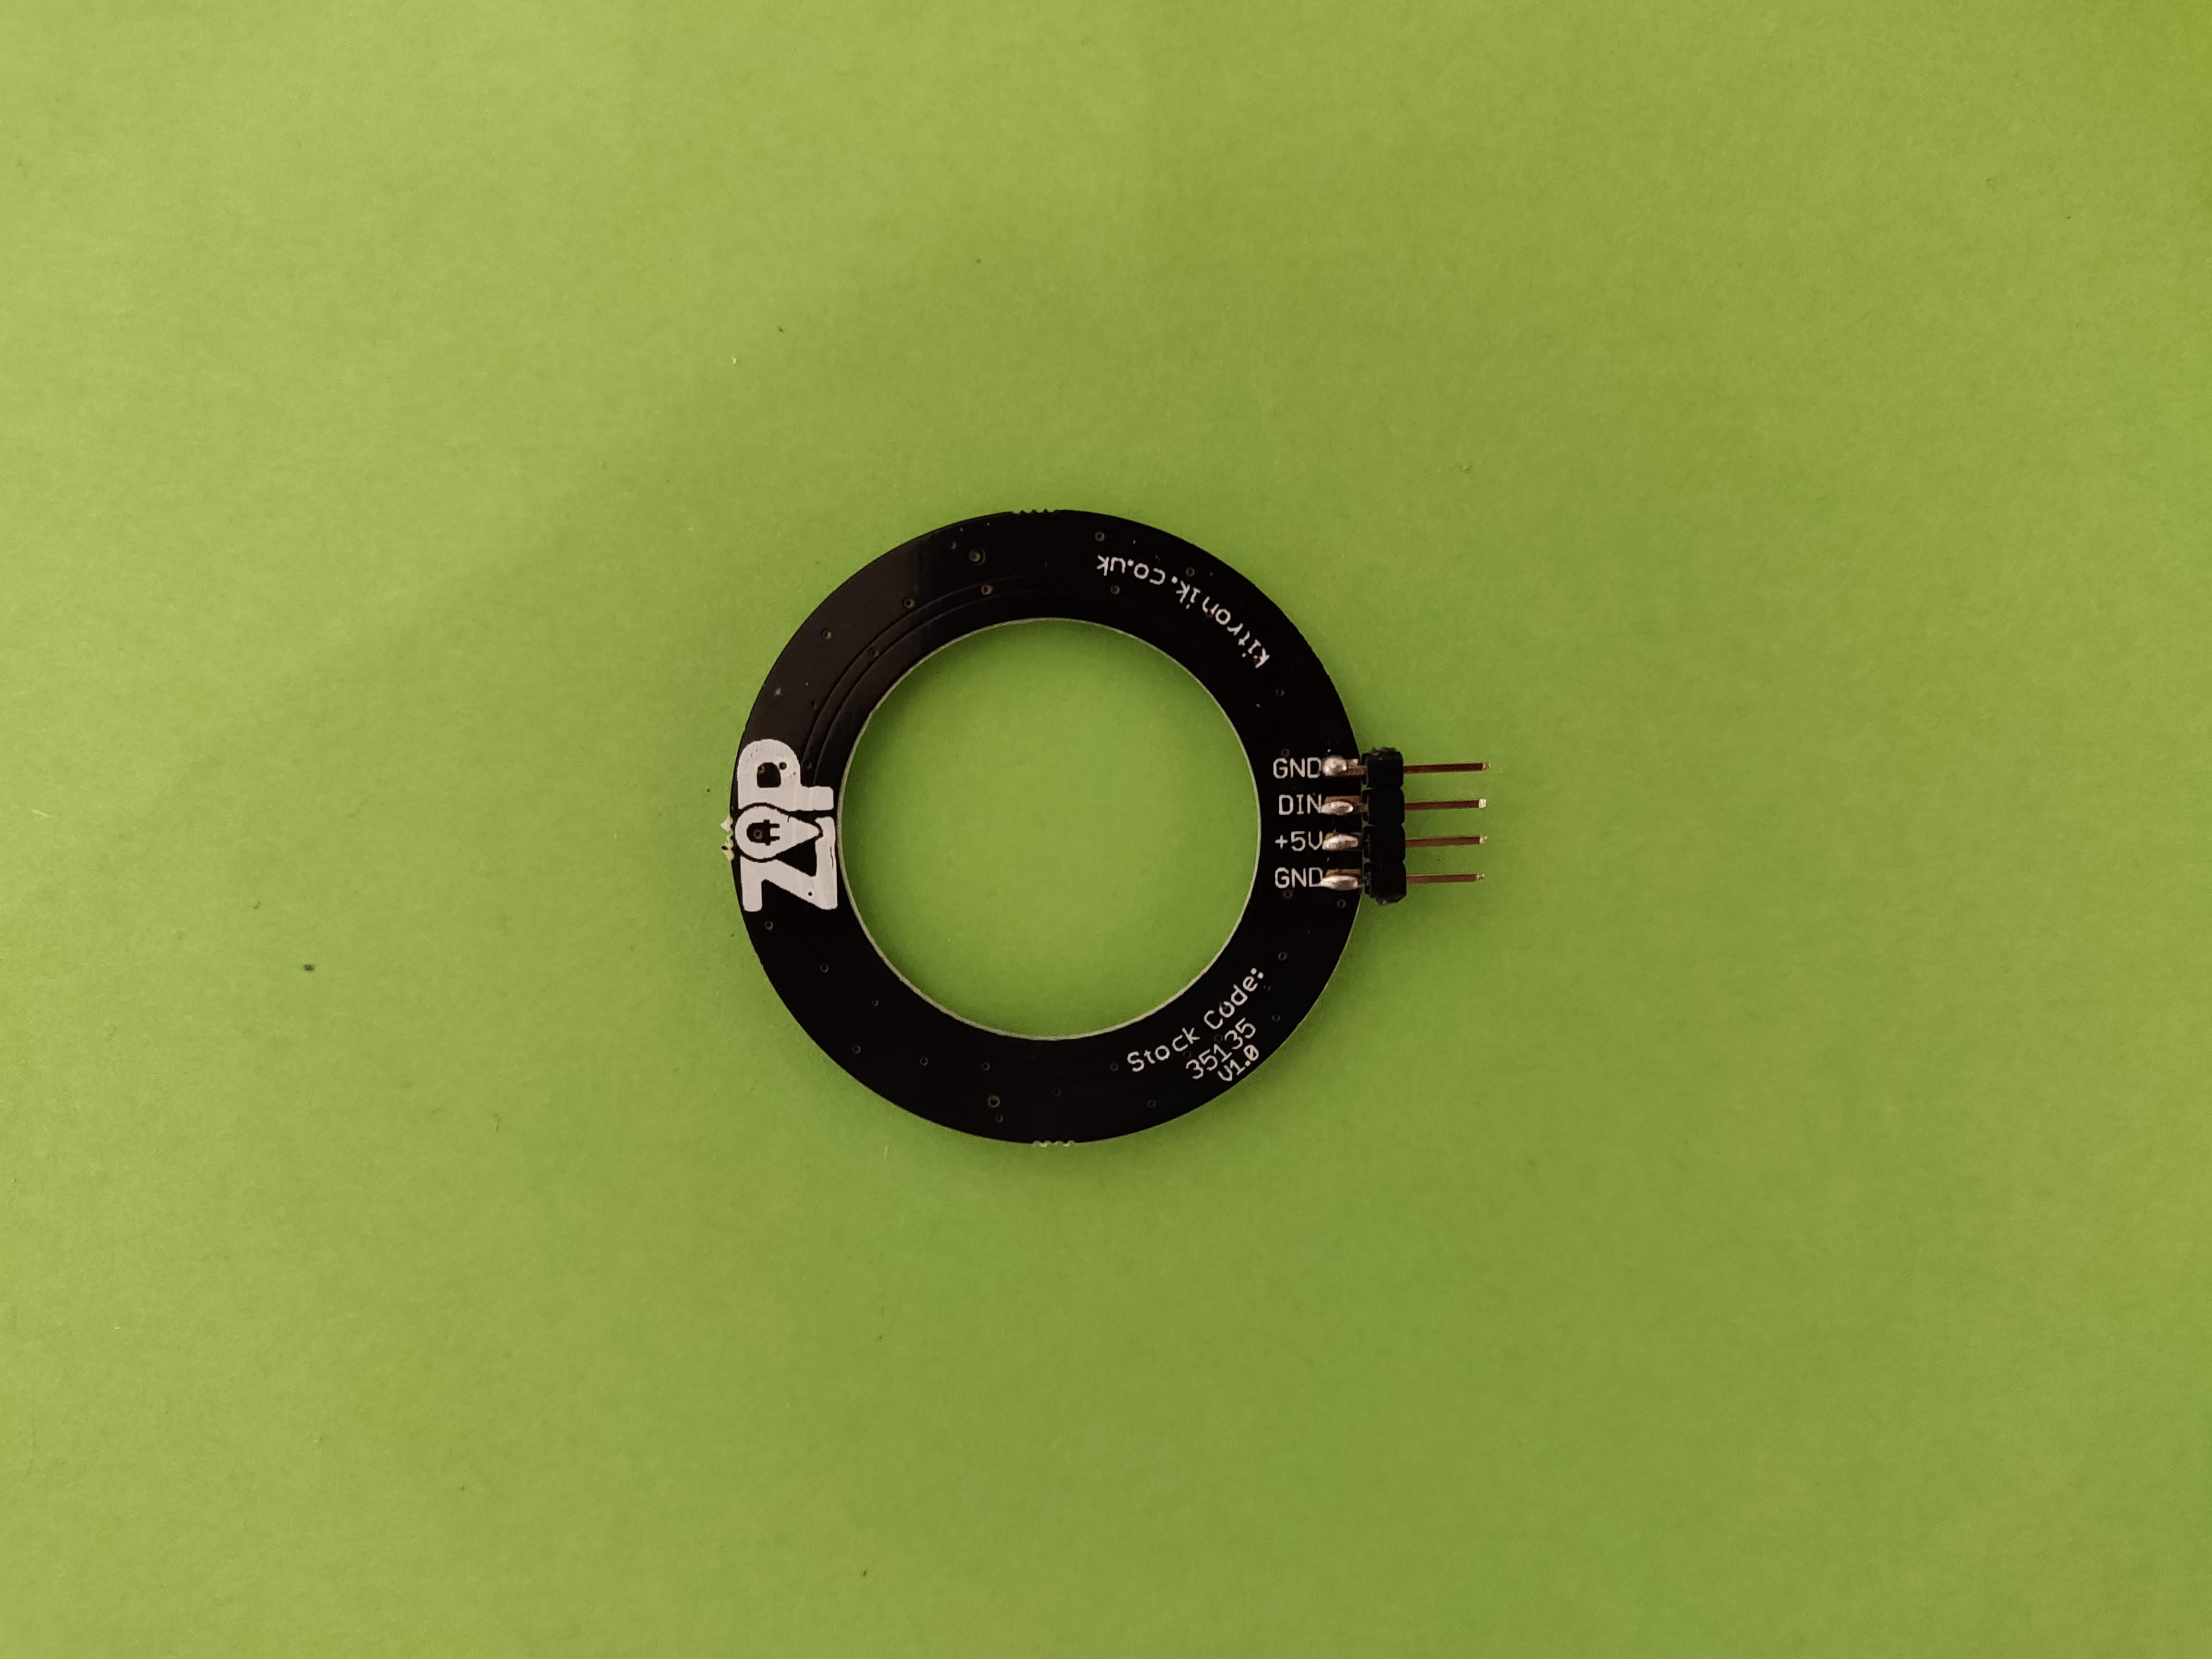
- Connect 3 female to female jumper wires to +5V, DIN and GND on the circle pins
- Connect 3 male to female jumpers to these wires, this makes the wiring longer so it can reach the goggles from the back of the hat.
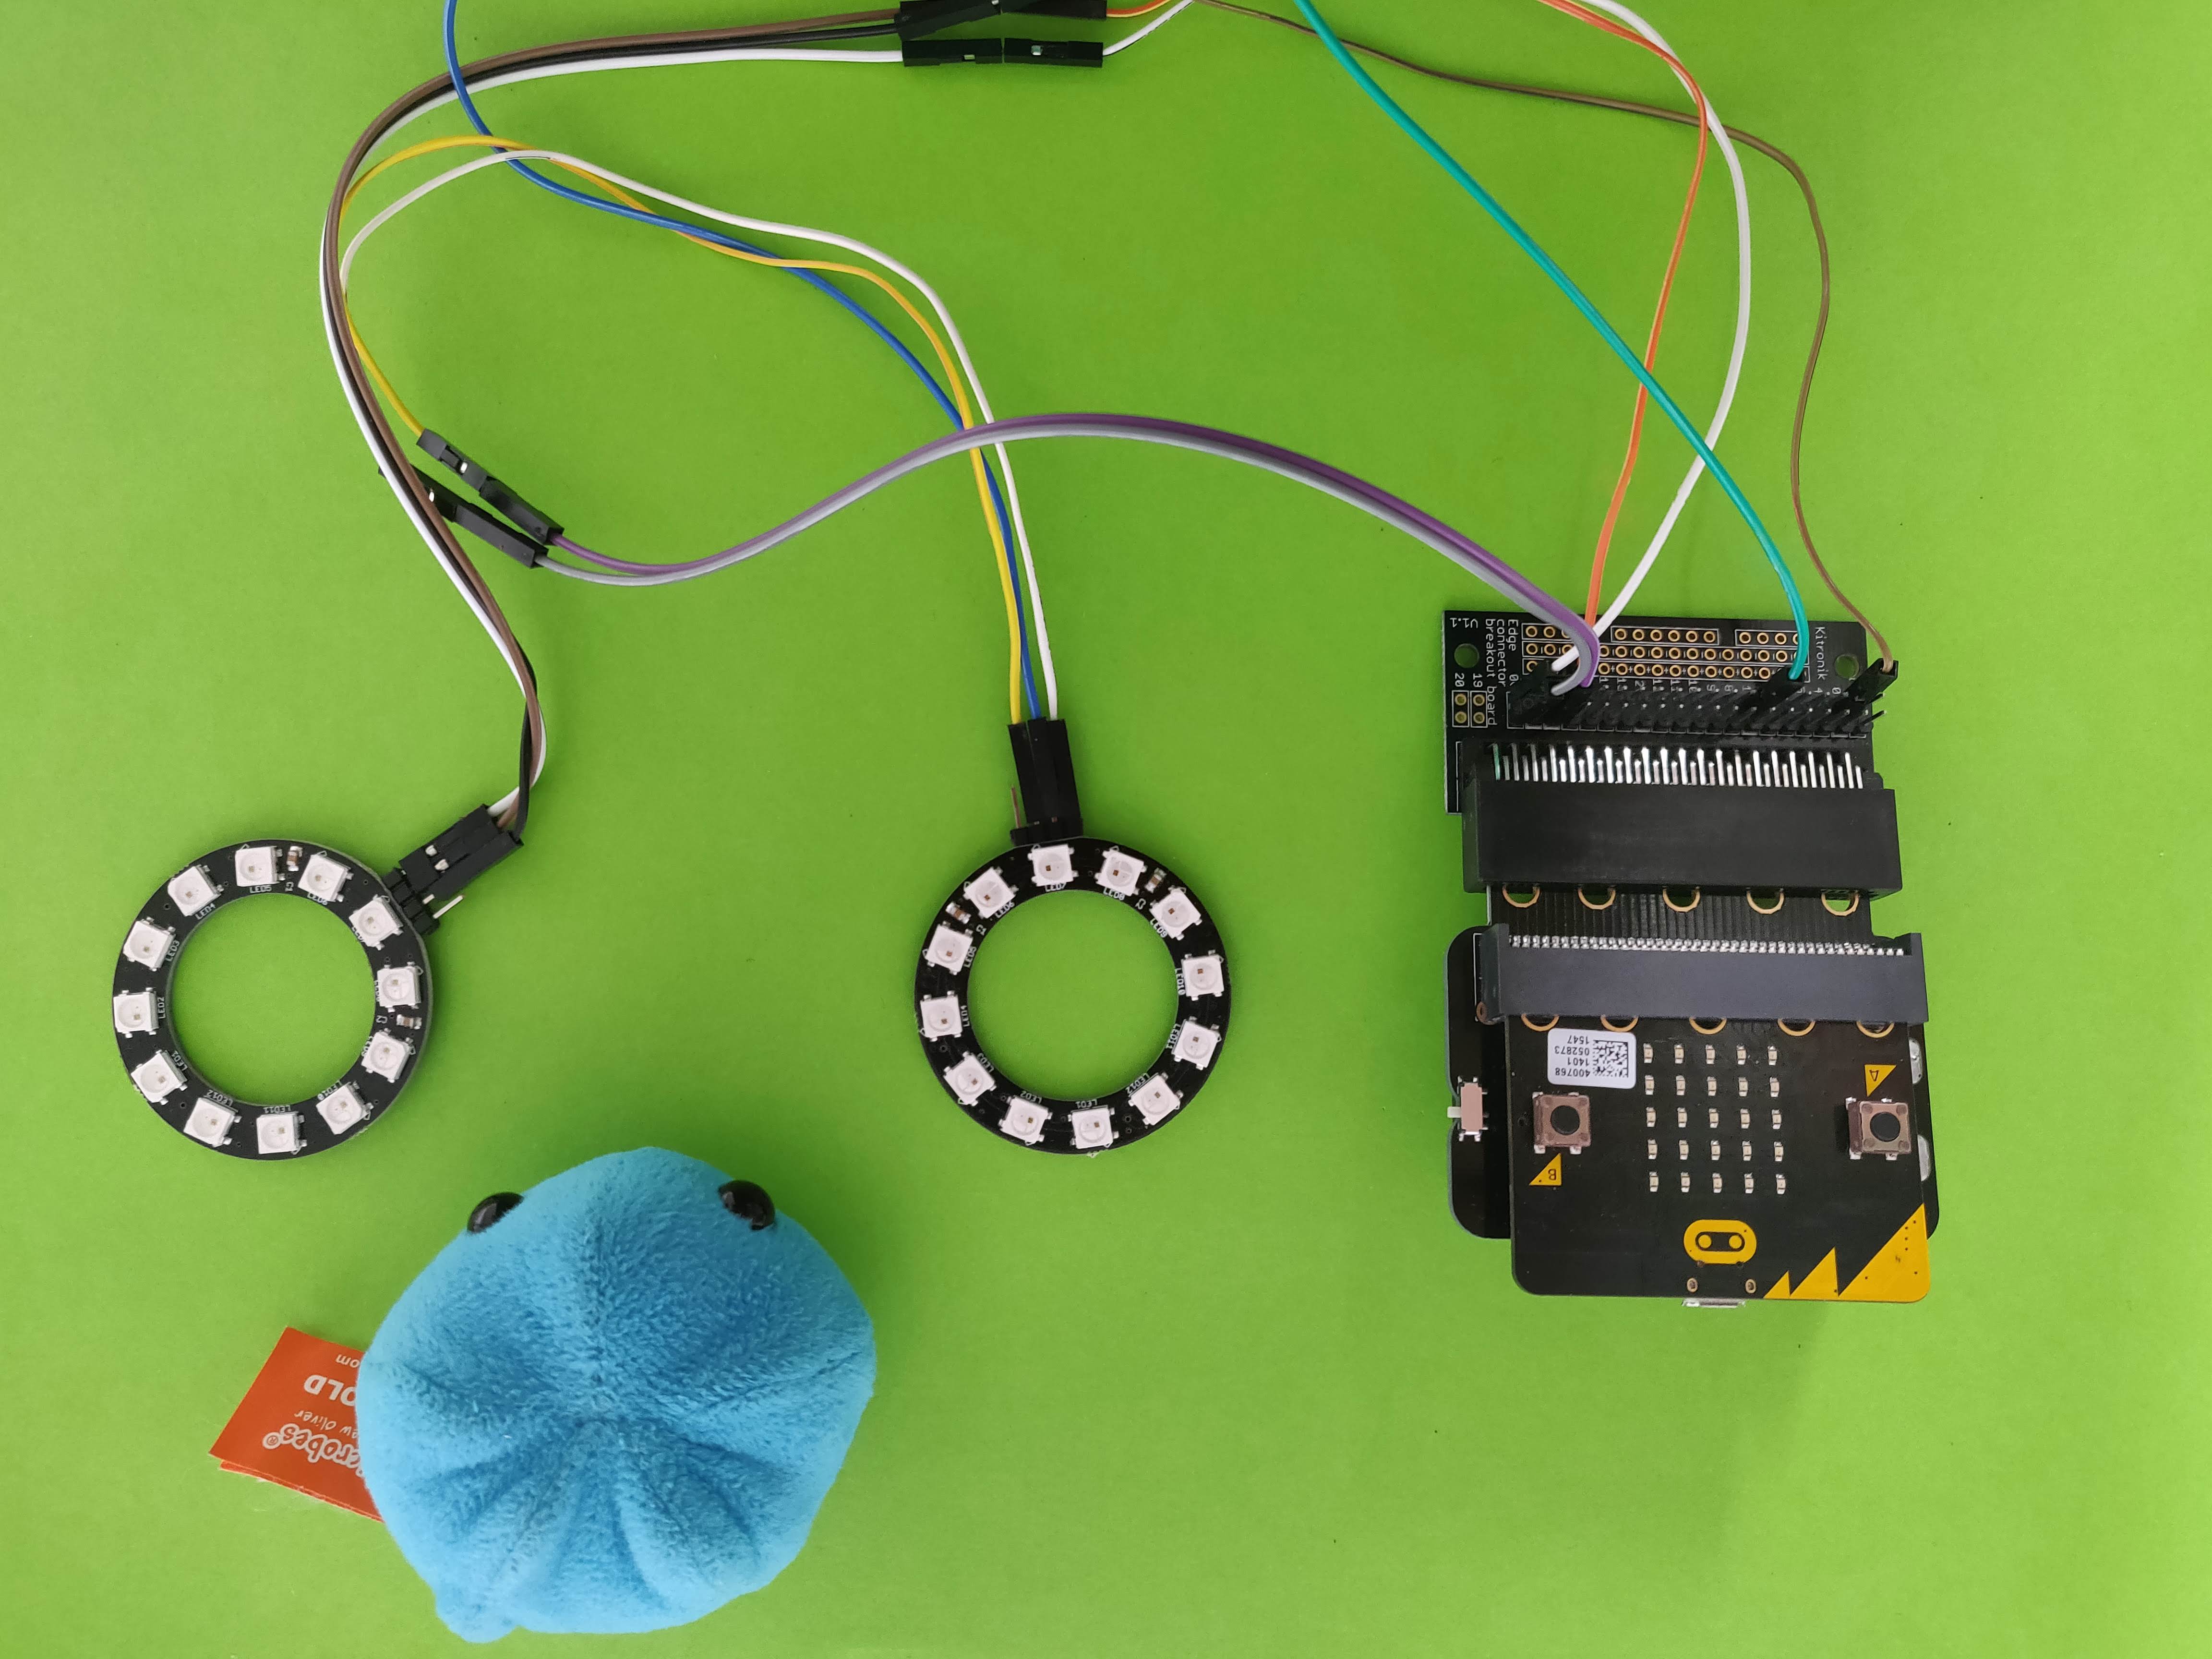
- From the circle to the breakout board, connect
a. +5V to 3V
b. Connect GND to 0V
c. Connect DIN to 0 - Do steps 2 to 4 for the second circle except on step c, connect DIN to 1
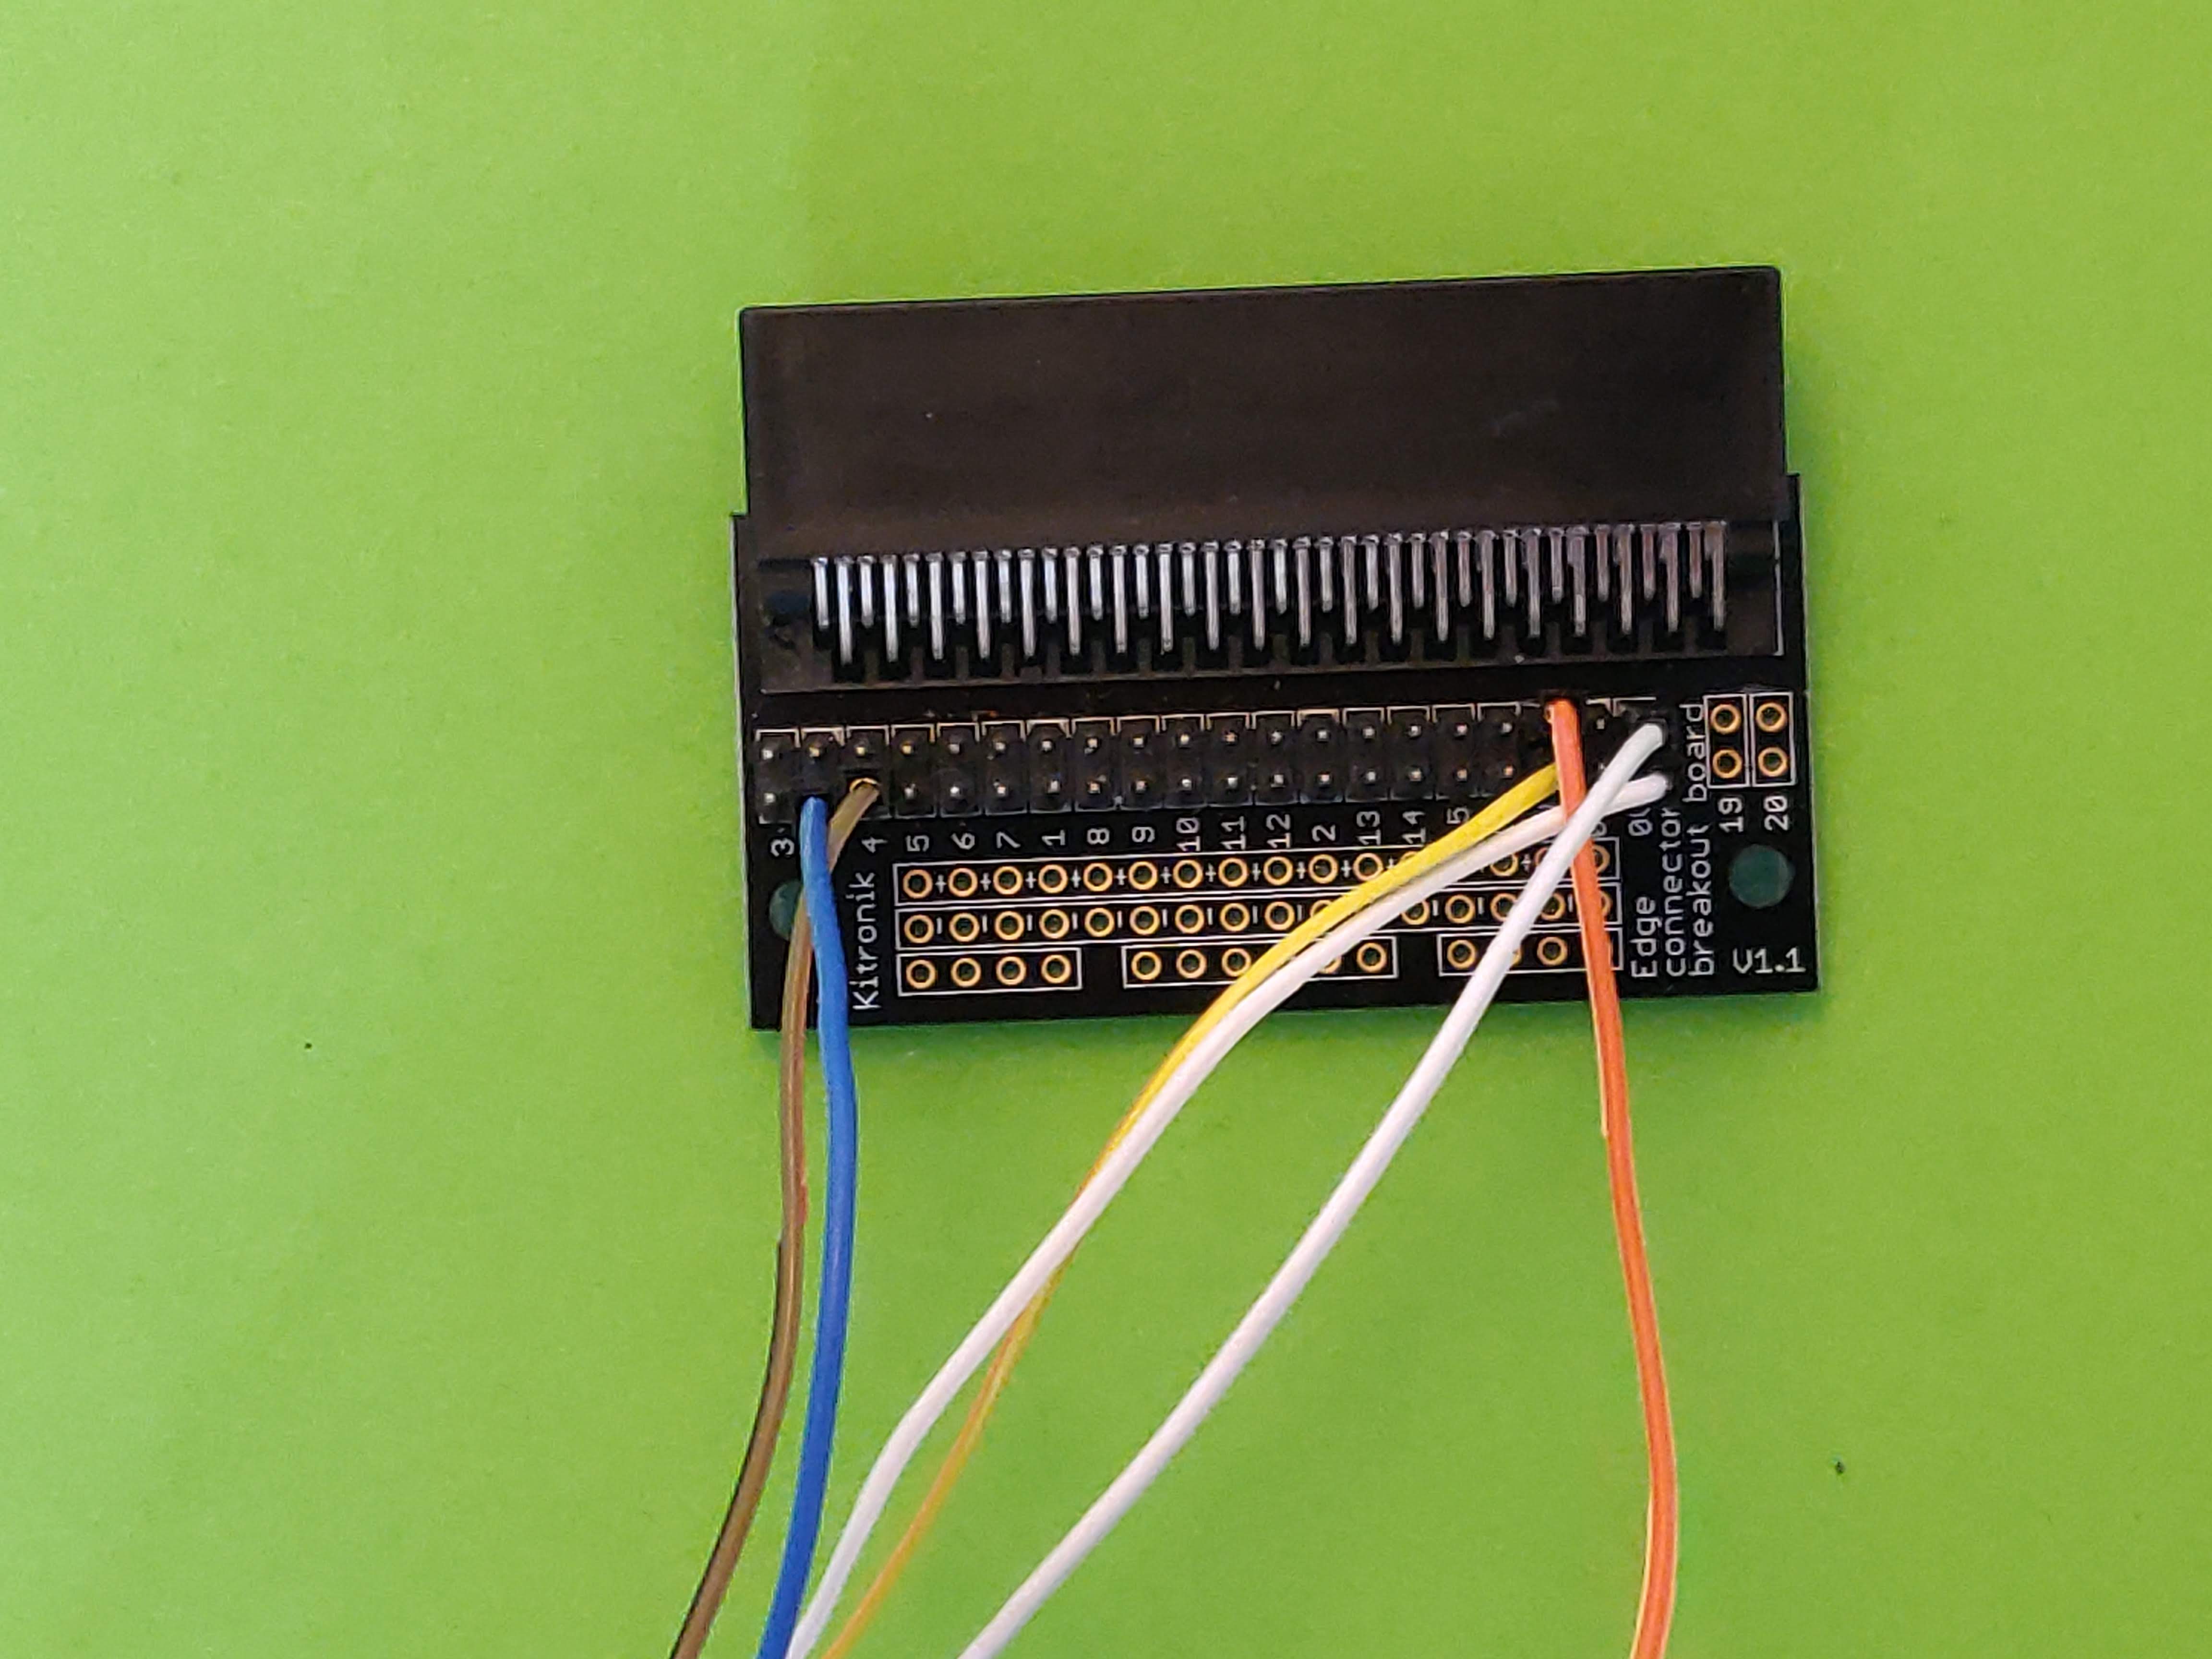
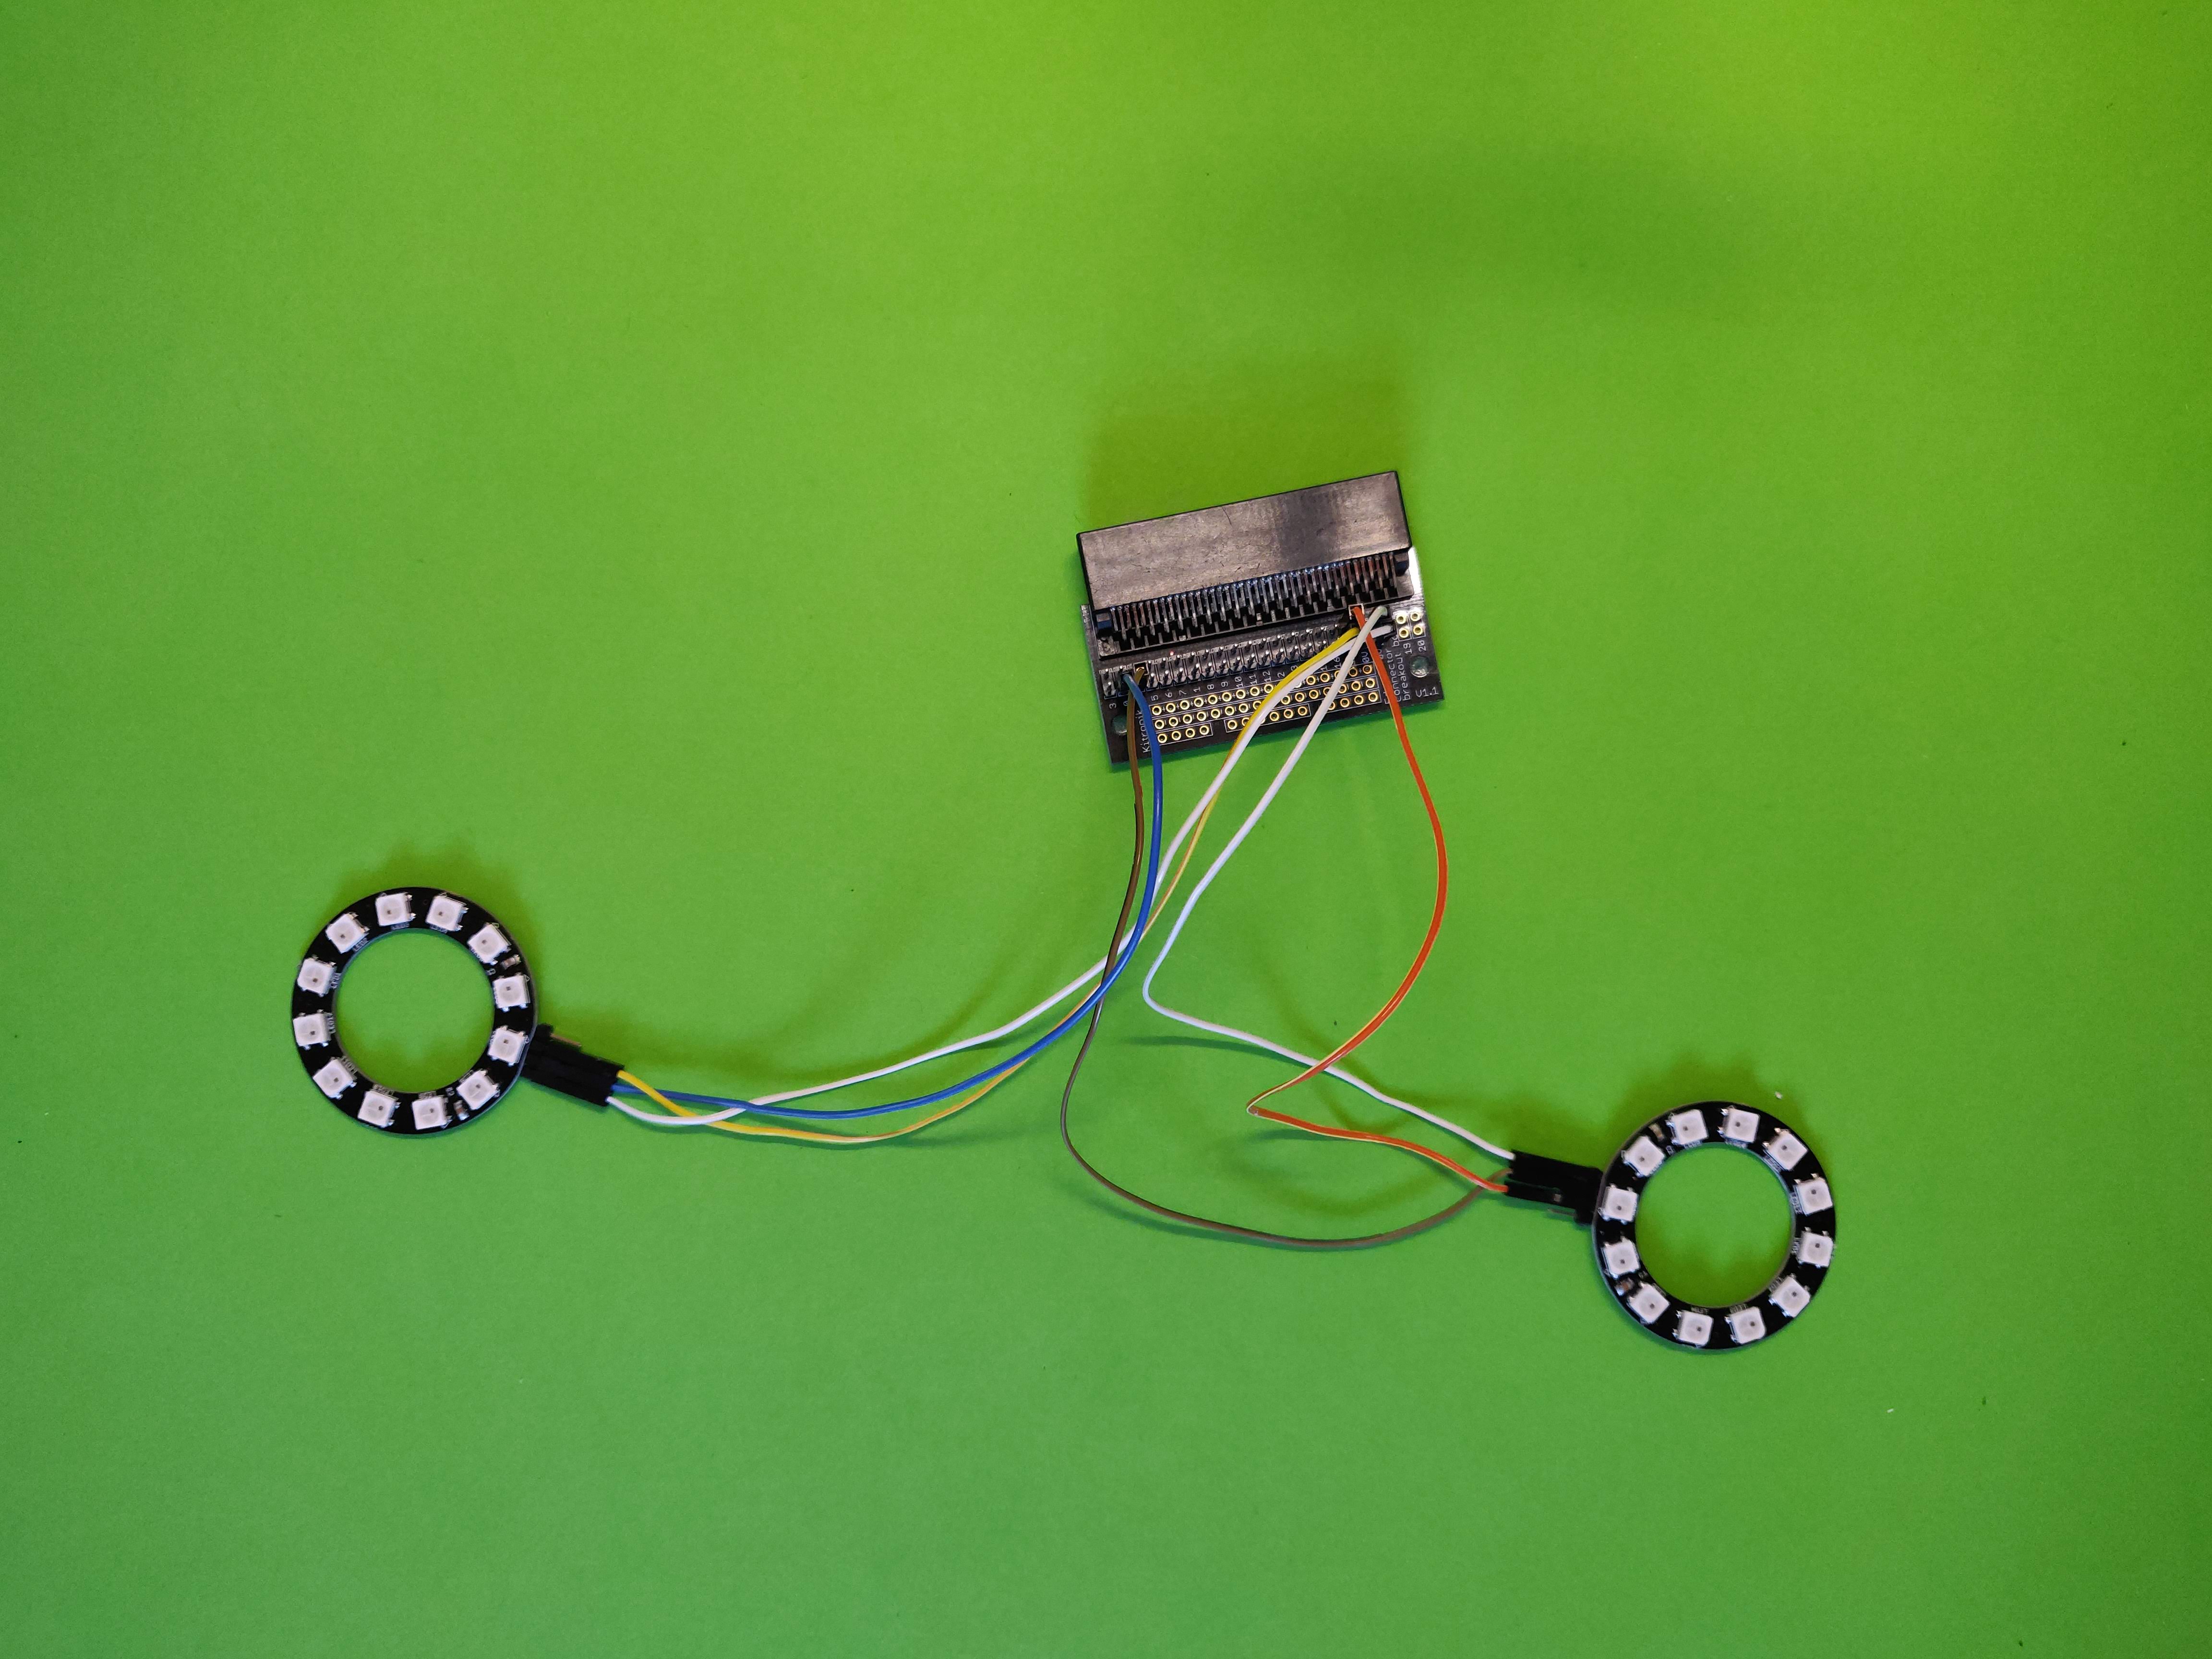
7. Plug the micro:bit into the edge connector breakoutboard and code it before attaching everything to the hat
Code
Add the Neopixel package
- Go to microbit.makecode.com
- Add the Neopixel package
- Select Advanced
- Select Add Package
- Select Neopixel
![]()
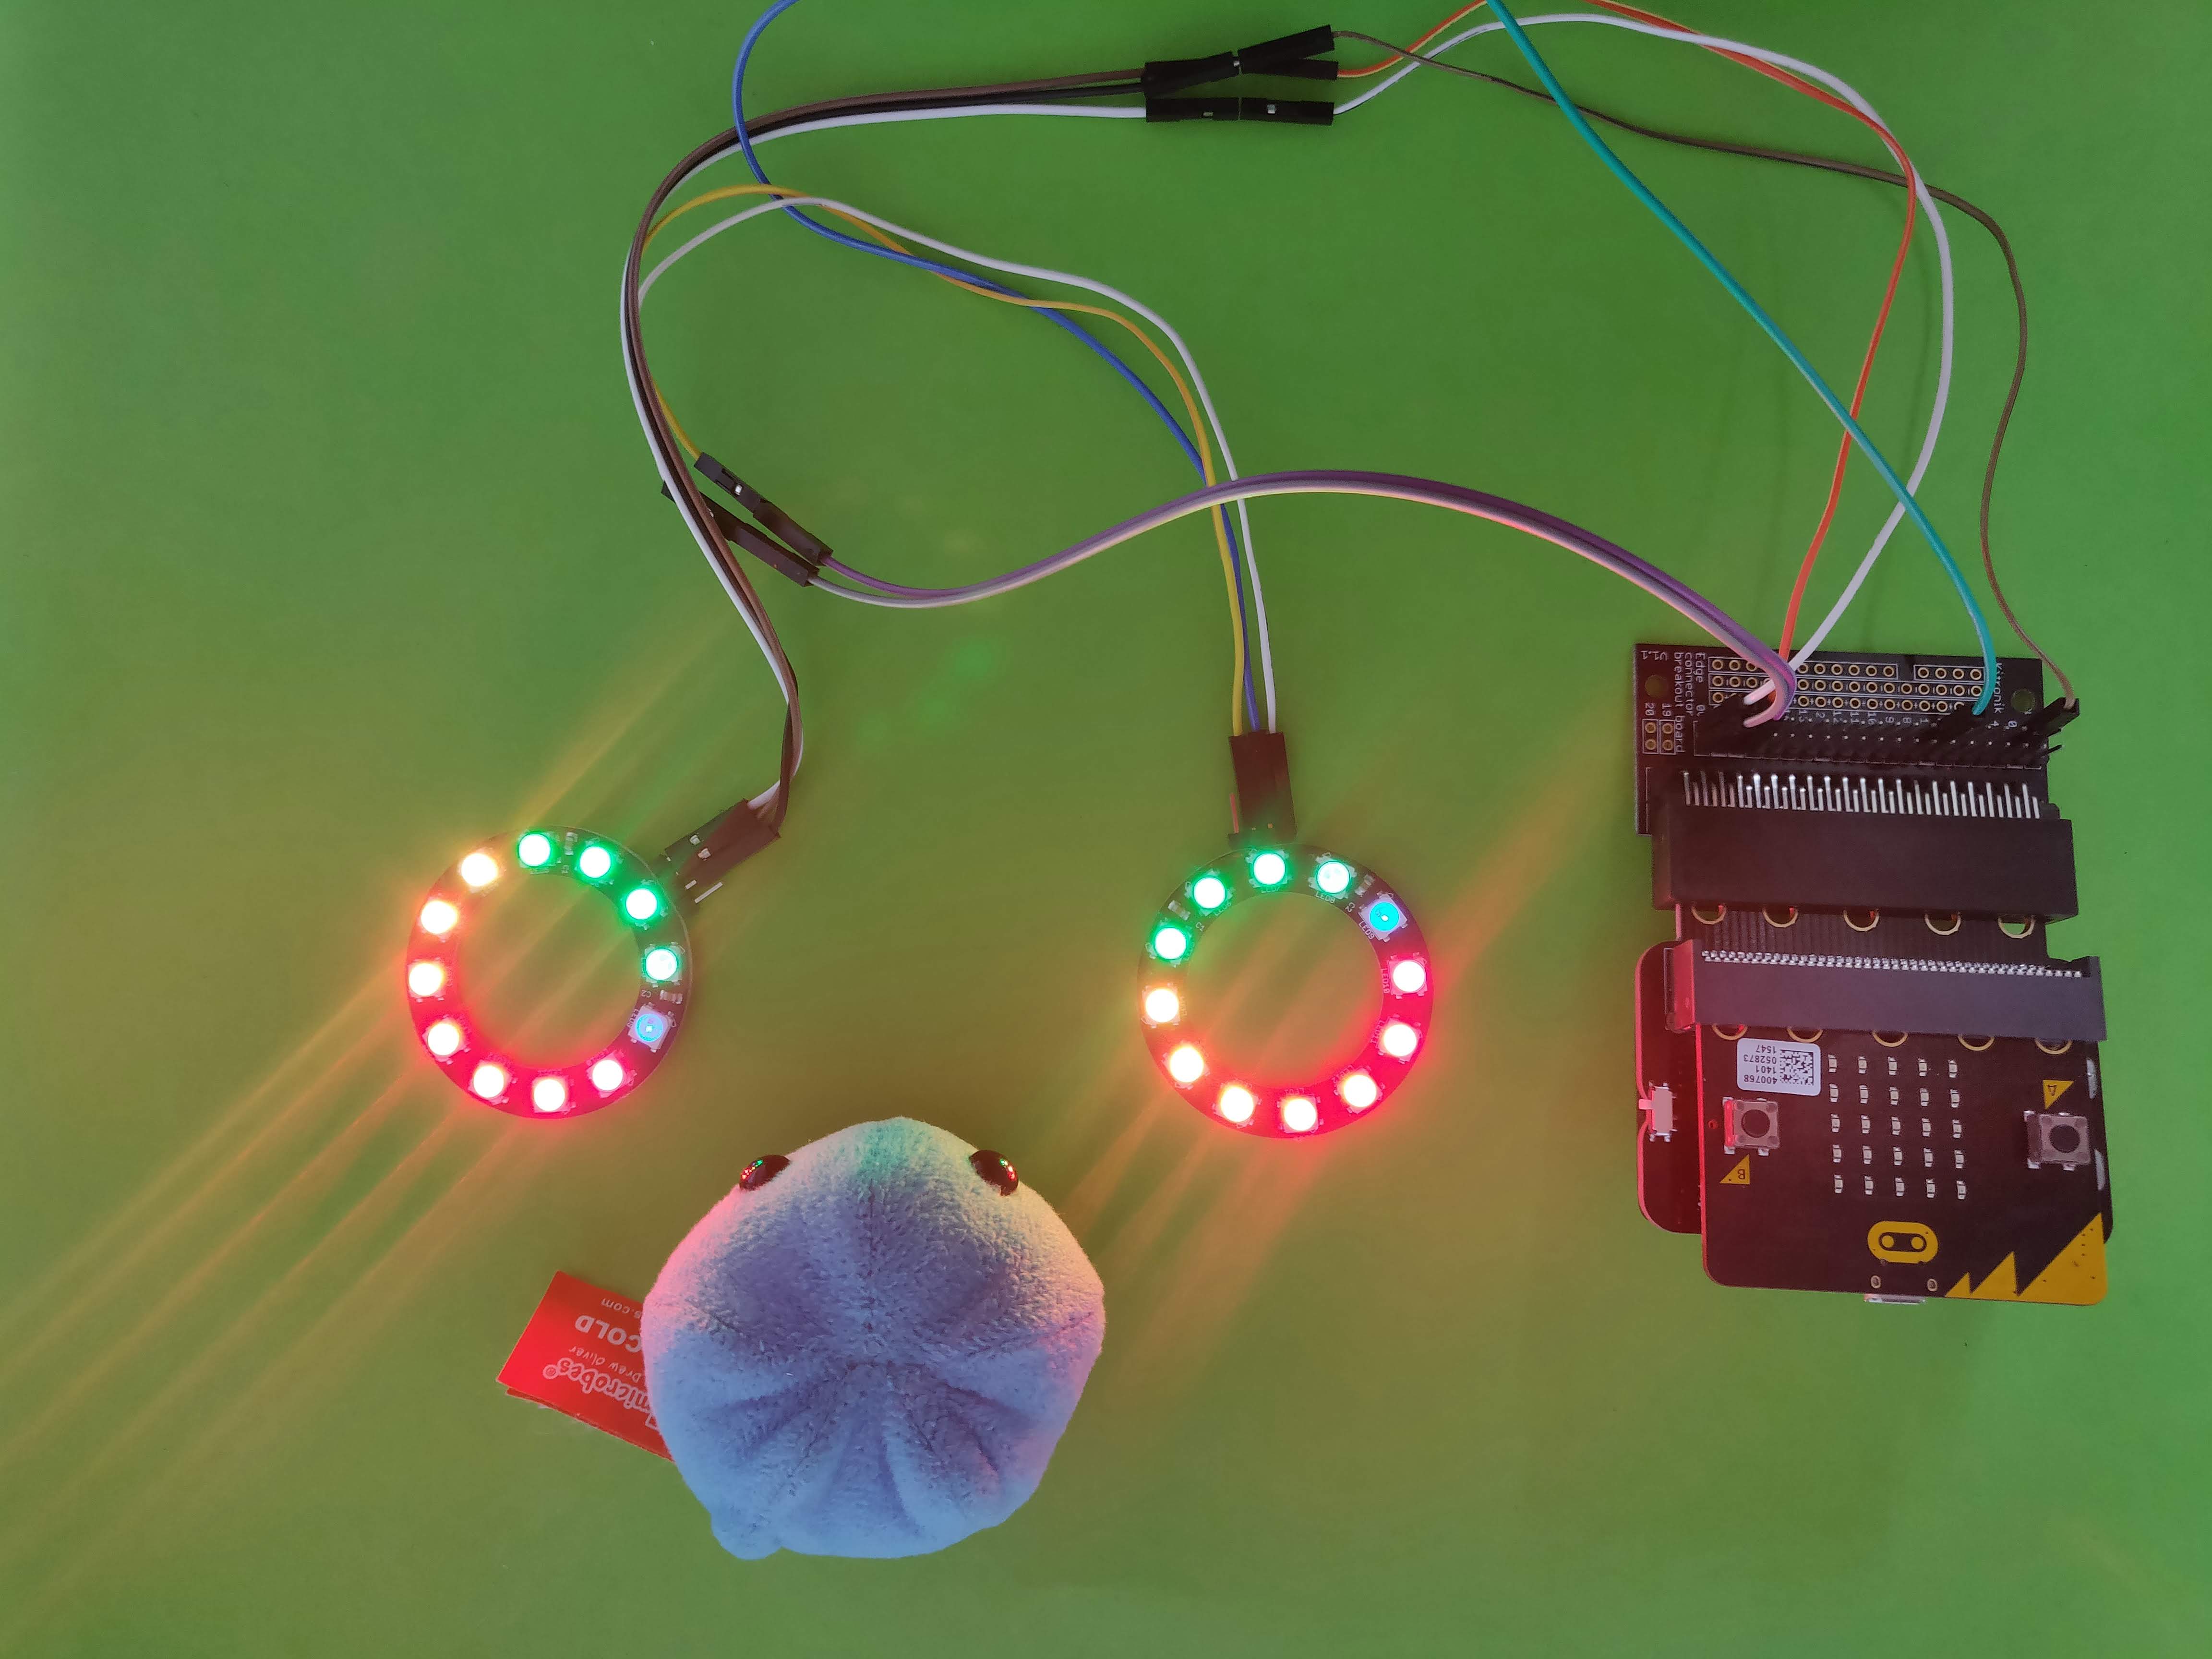
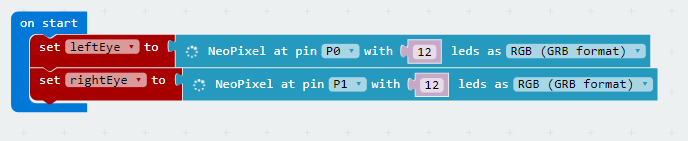
There are two circles connected to the micro:bit. They are not connected in series. So we need to declare two variables, LeftEye and RightEye and set them to the neopixel strips on Pin0 and Pin1
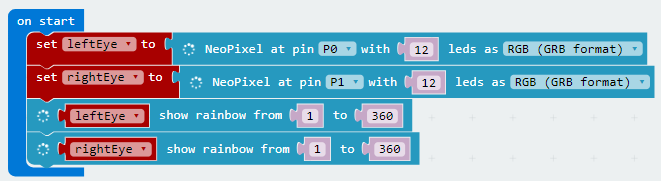
Put some rainbow code to test the lights:
To learn how to create the code above see the previous post:
/power-rangers-light-up-sword/
Download and test the code
- Plug your micro:bit into your computer with a USB cable
- Select Download
- In Chrome the file will go to your Downloads folder. Go to your Downloads folder and drag your file onto the micro:bit
- In Internet Explorer it will ask you where to save your file to. Select "Save As" then select the micro:bit
- In Chrome the file will go to your Downloads folder. Go to your Downloads folder and drag your file onto the micro:bit
Enjoy your shiny goggles!
Try creating some flashing code by changing the colour of each eye
Alternative build
Instead of using the normal battery pack which is awkward, can dangle and only takes 2 AAAs try out the bat:bit from proto-pic. It has 2 AAs and the micro:bit sits in front of the batteries and (most importantly) it has an on/off switch.
Full disclosure: I ordered a cool arm keyboard from proto-pic and they put a bat:bit and other things in the parcel, for free.
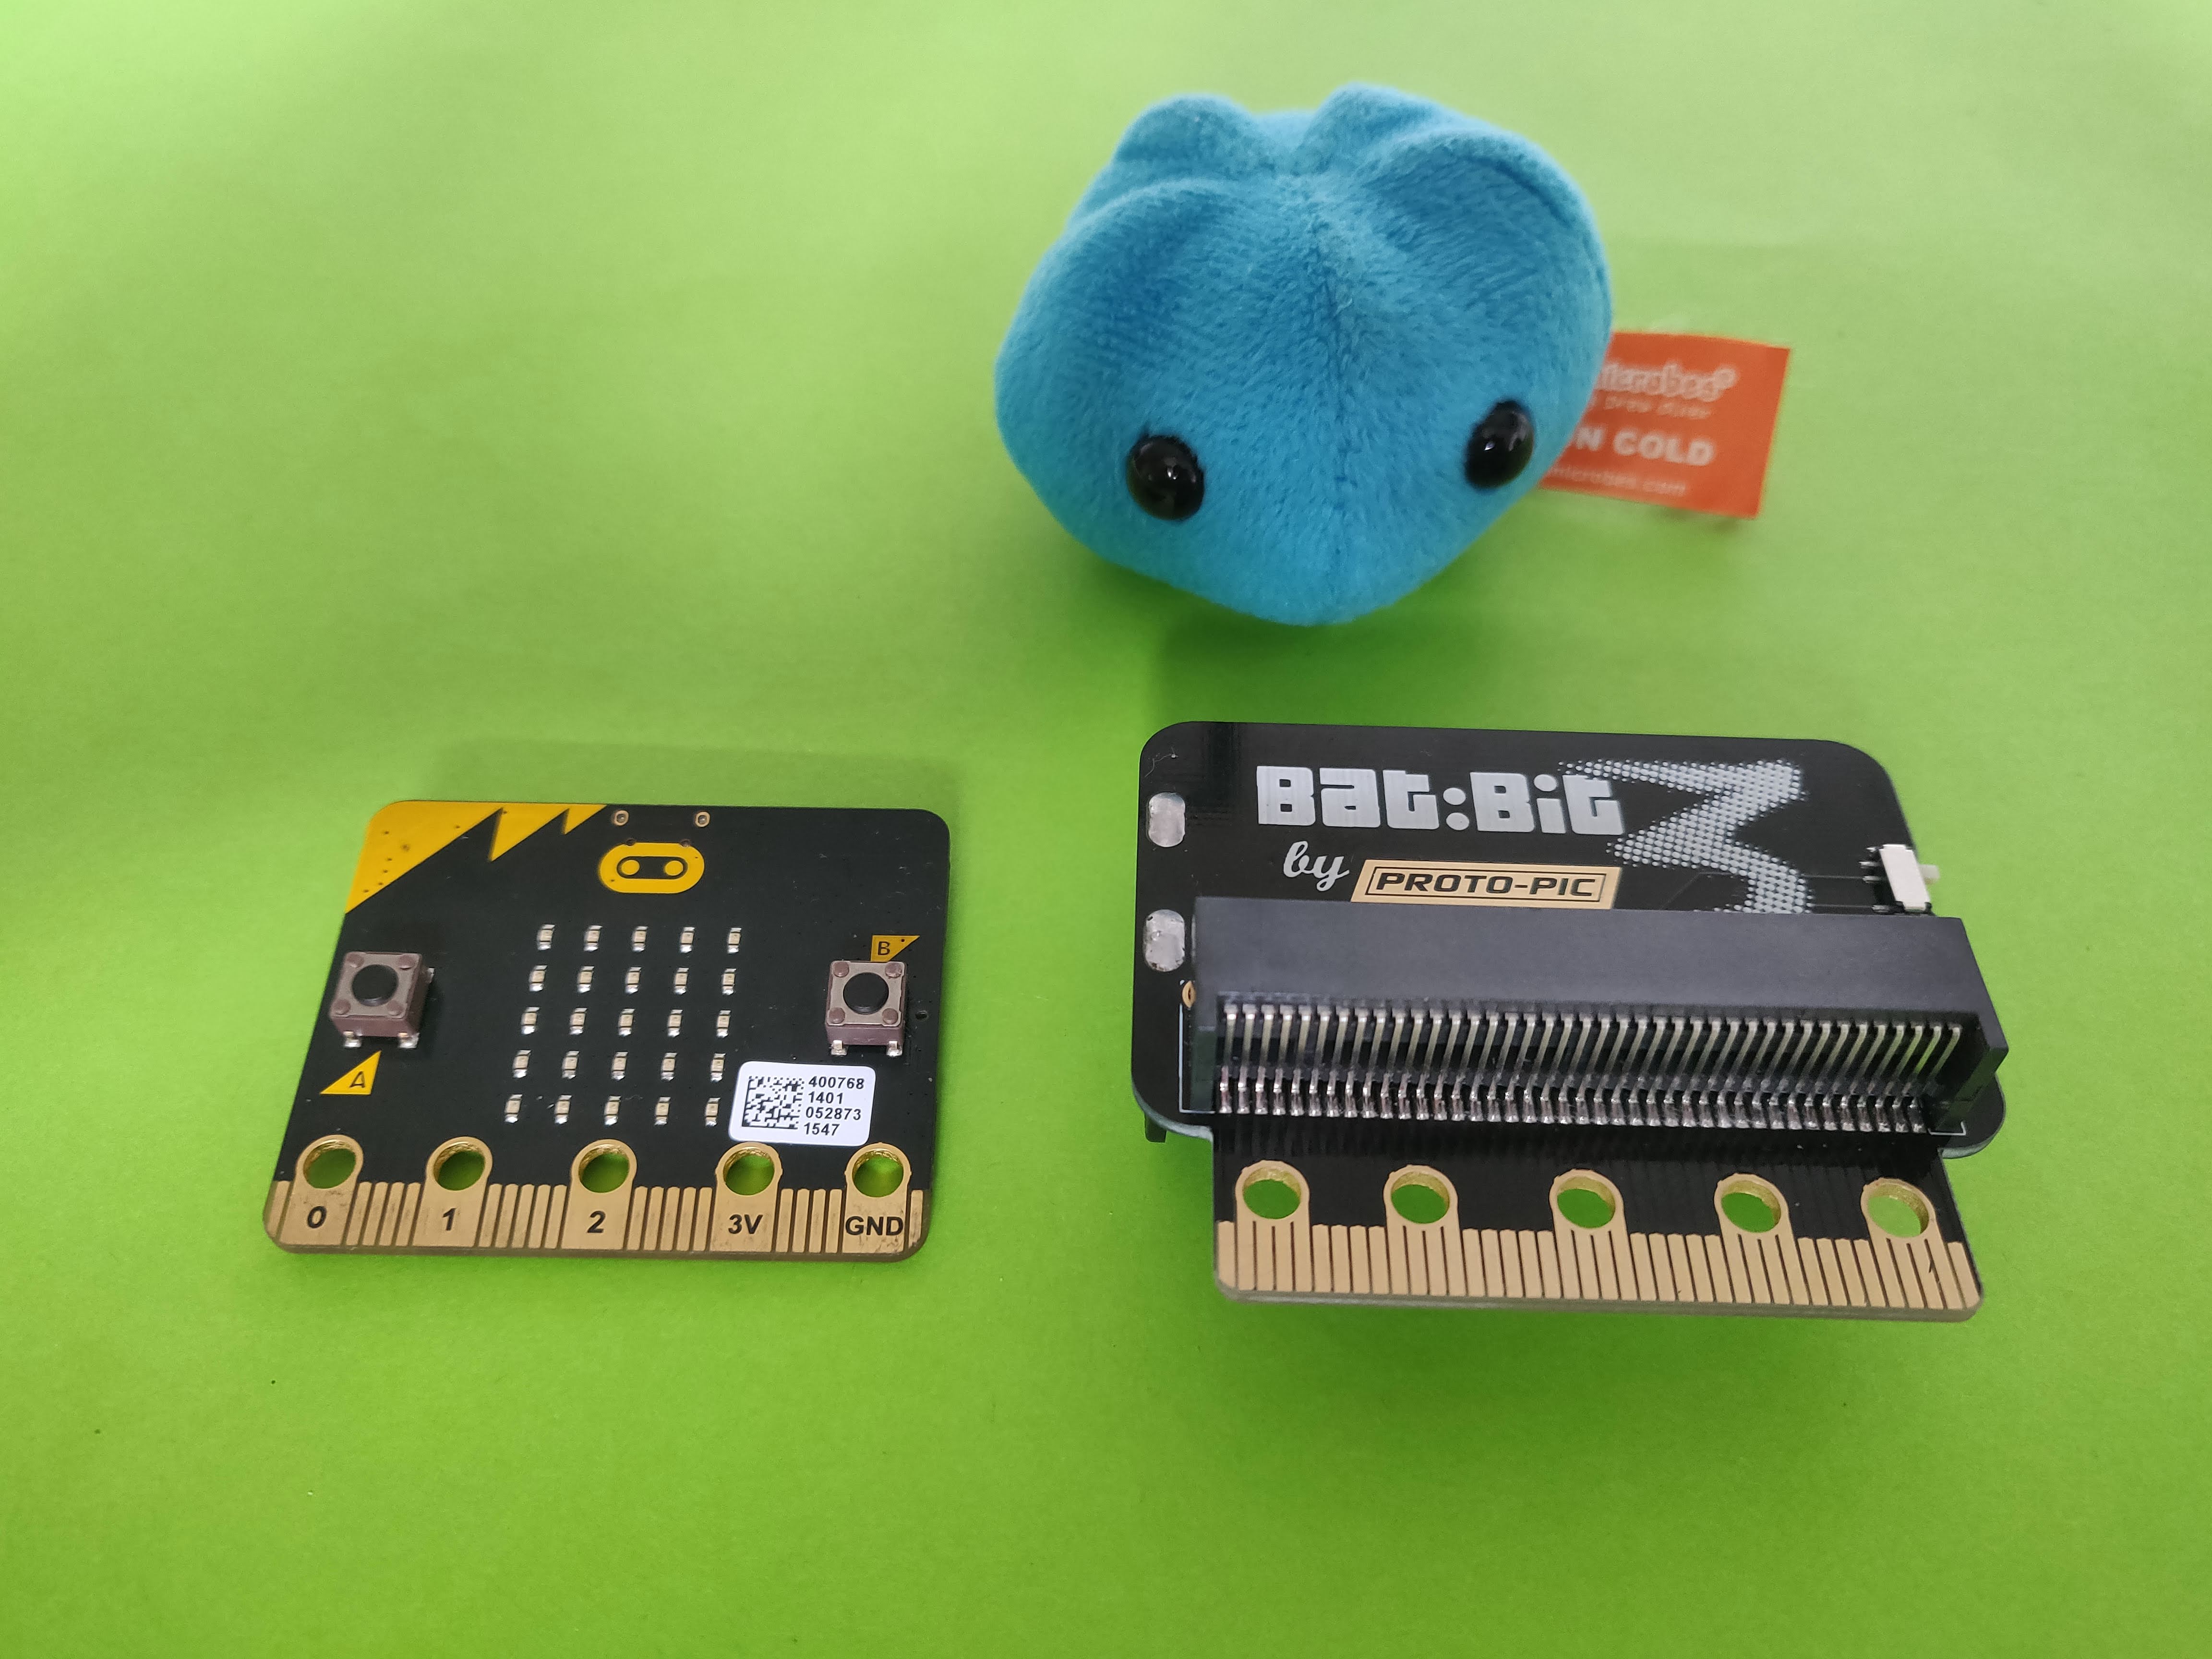
The micro:bit slots in front of the batteries:
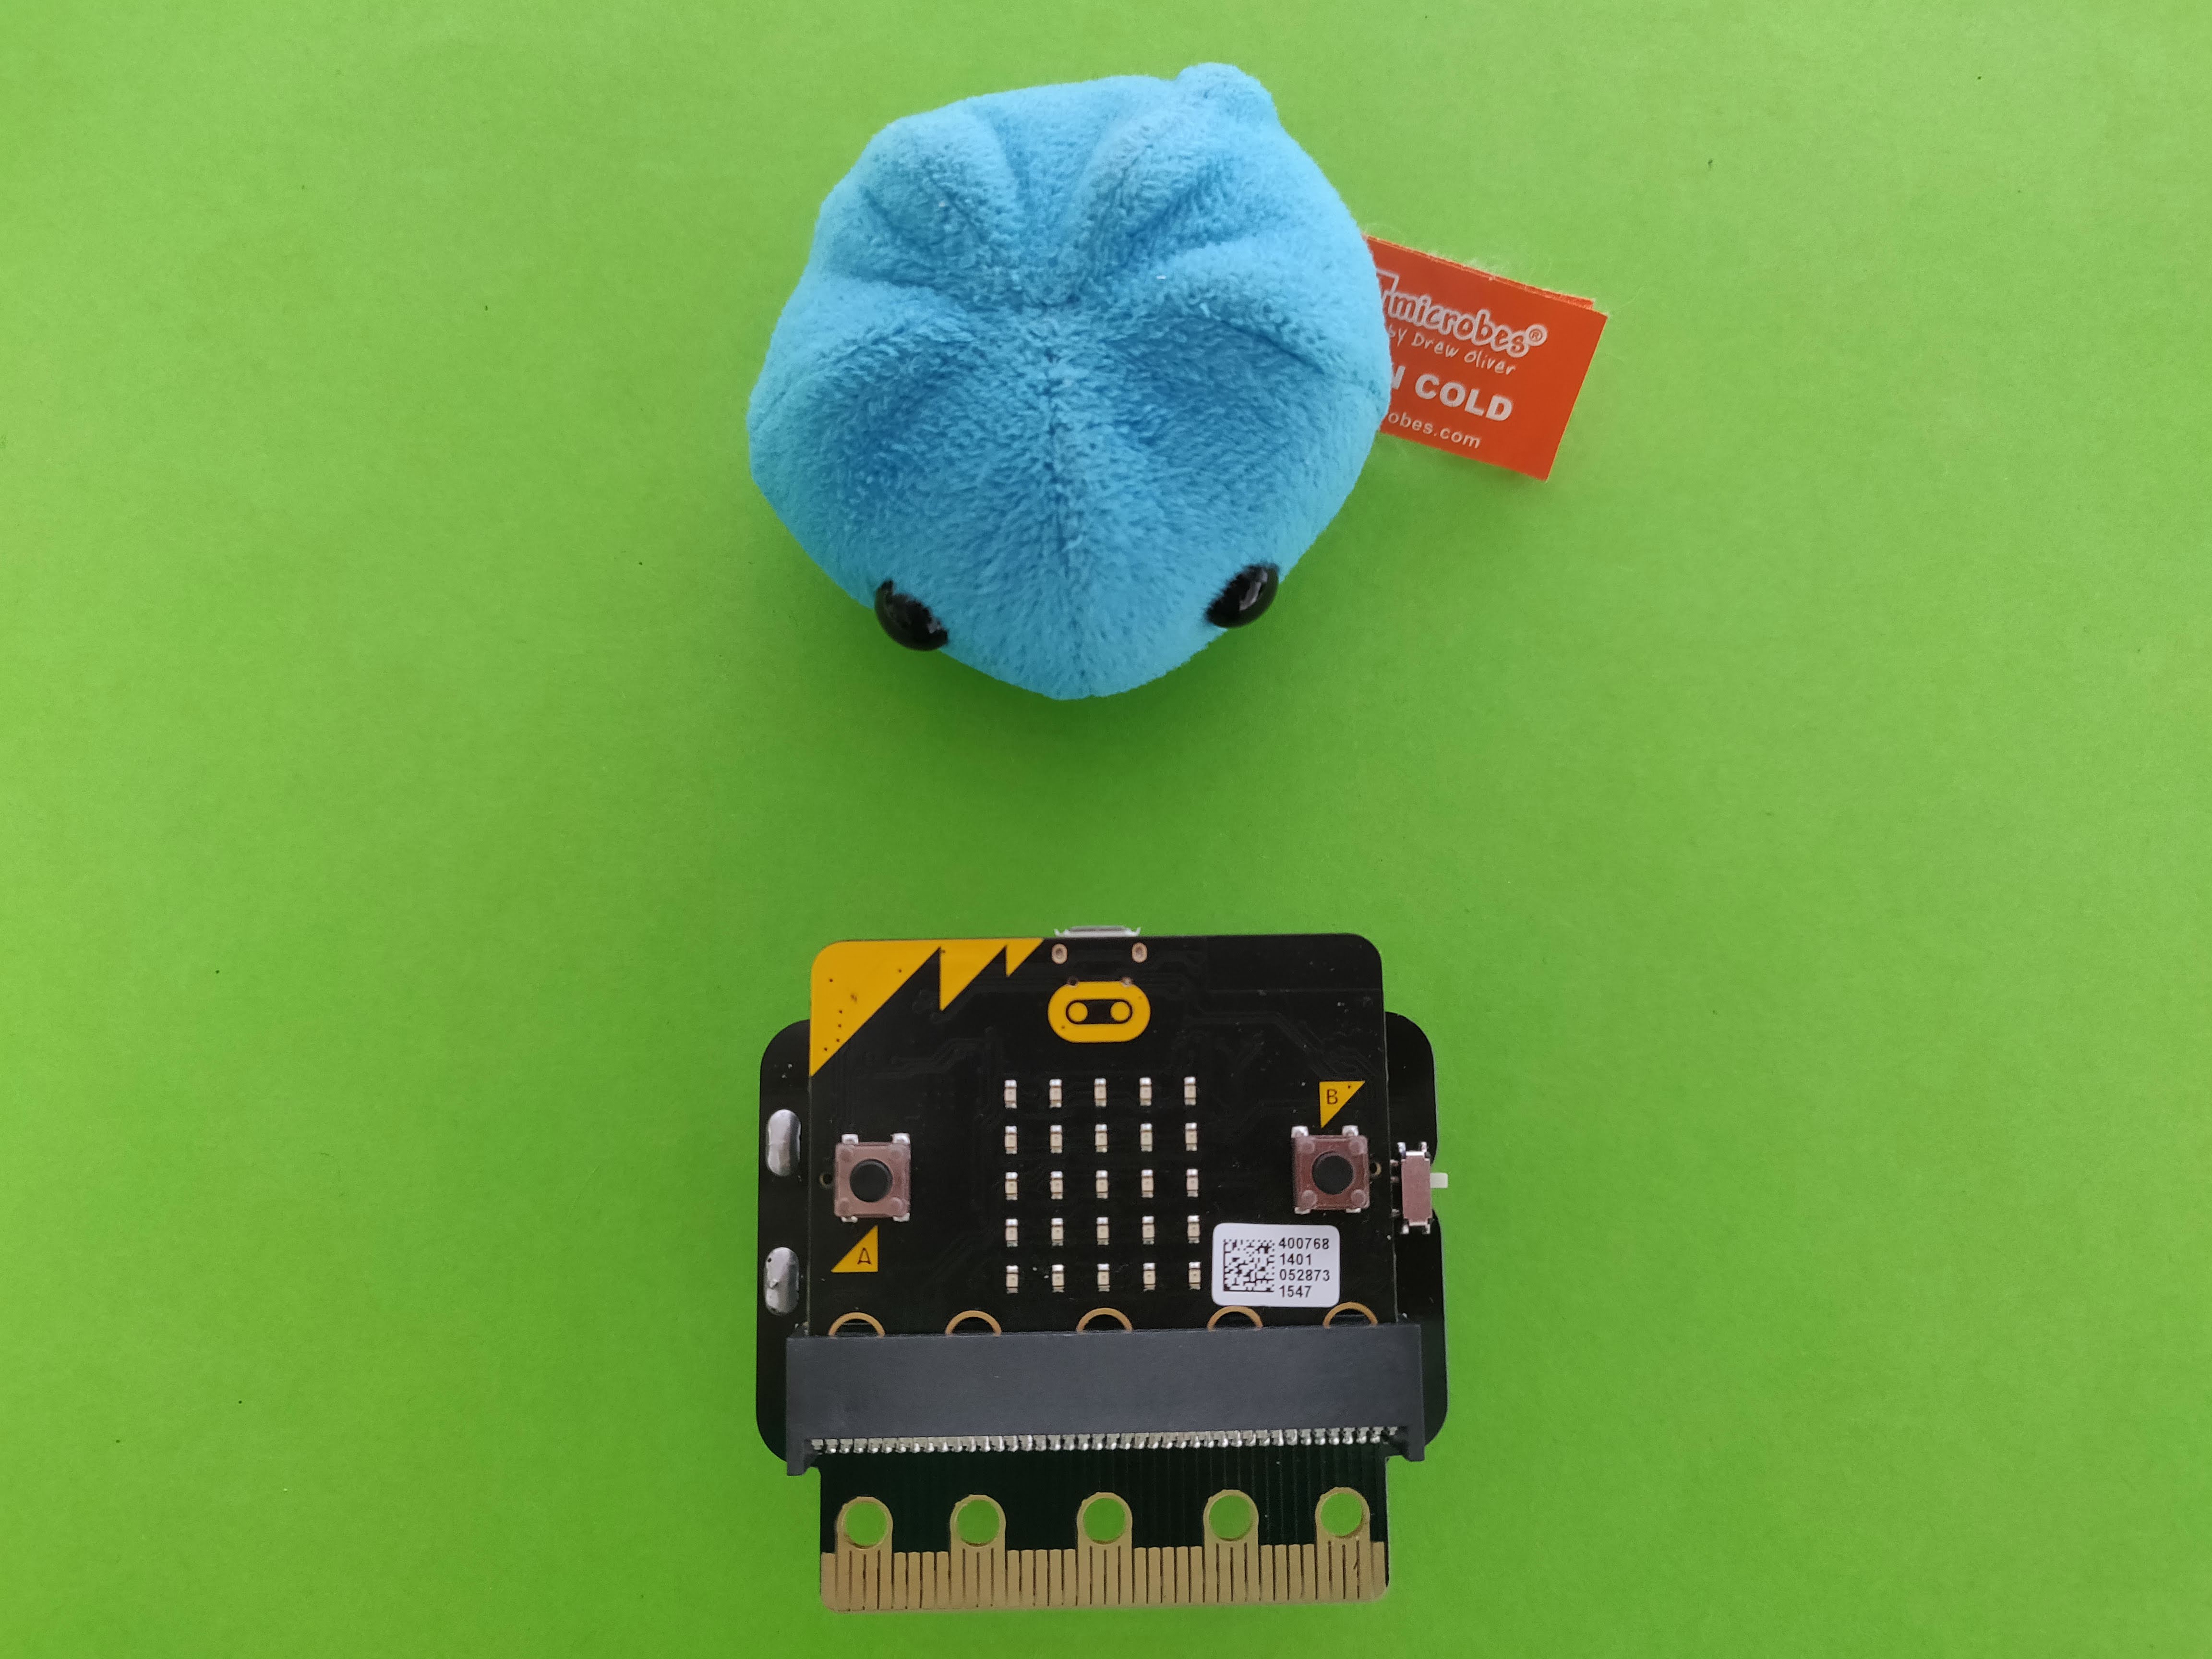
Then it can slot into the edge connector:
Shiny!
