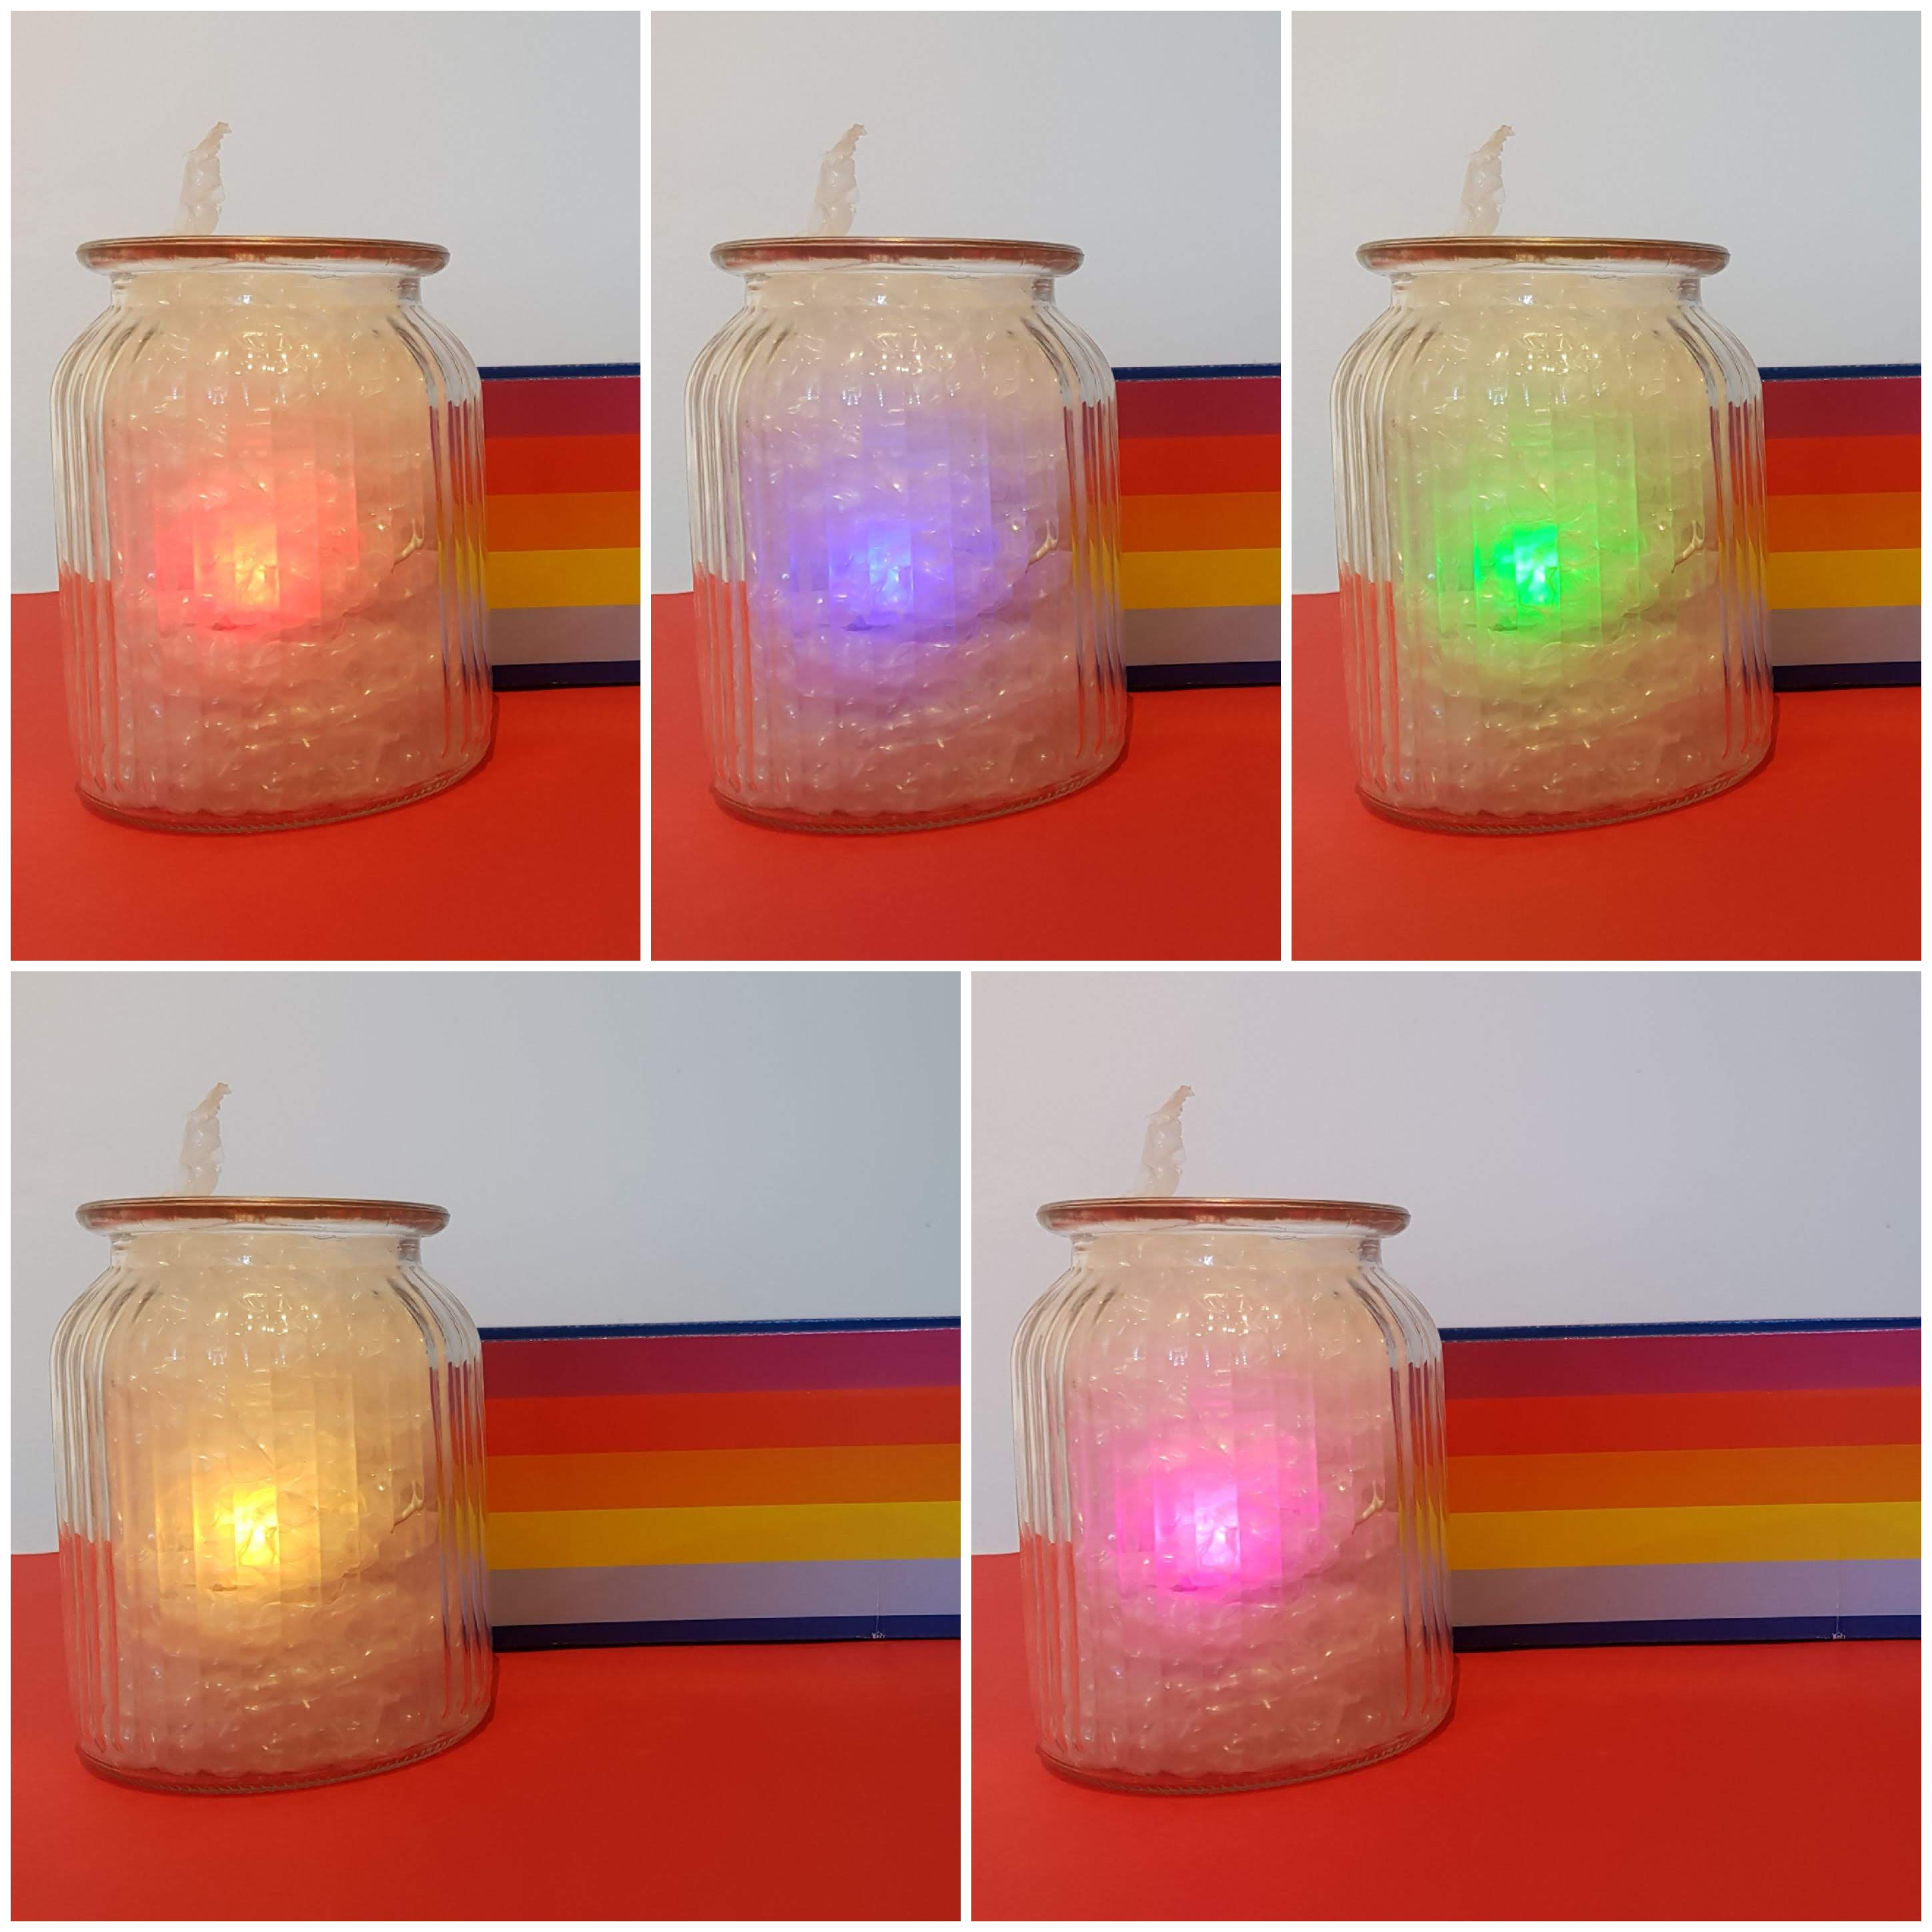
Light up dream jar
As a child Roald Dahl's the BFG was one on my favourite stories. If you're not familiar with the story: a Big Friendly Giant visits children in their sleep and blows dreams into their bedrooms at night using a long trumpet and a jar of dreams that he caught in Dream Country. The dreams are lights inside that jar that change colour.
I decided to recreate the dream jar using a micro:bit and some RGB LEDs. I used bubble wrap in the jar to create the effect of a "dream" and it looks awesome! Below are instructions for adding one light but I think more would look good too.
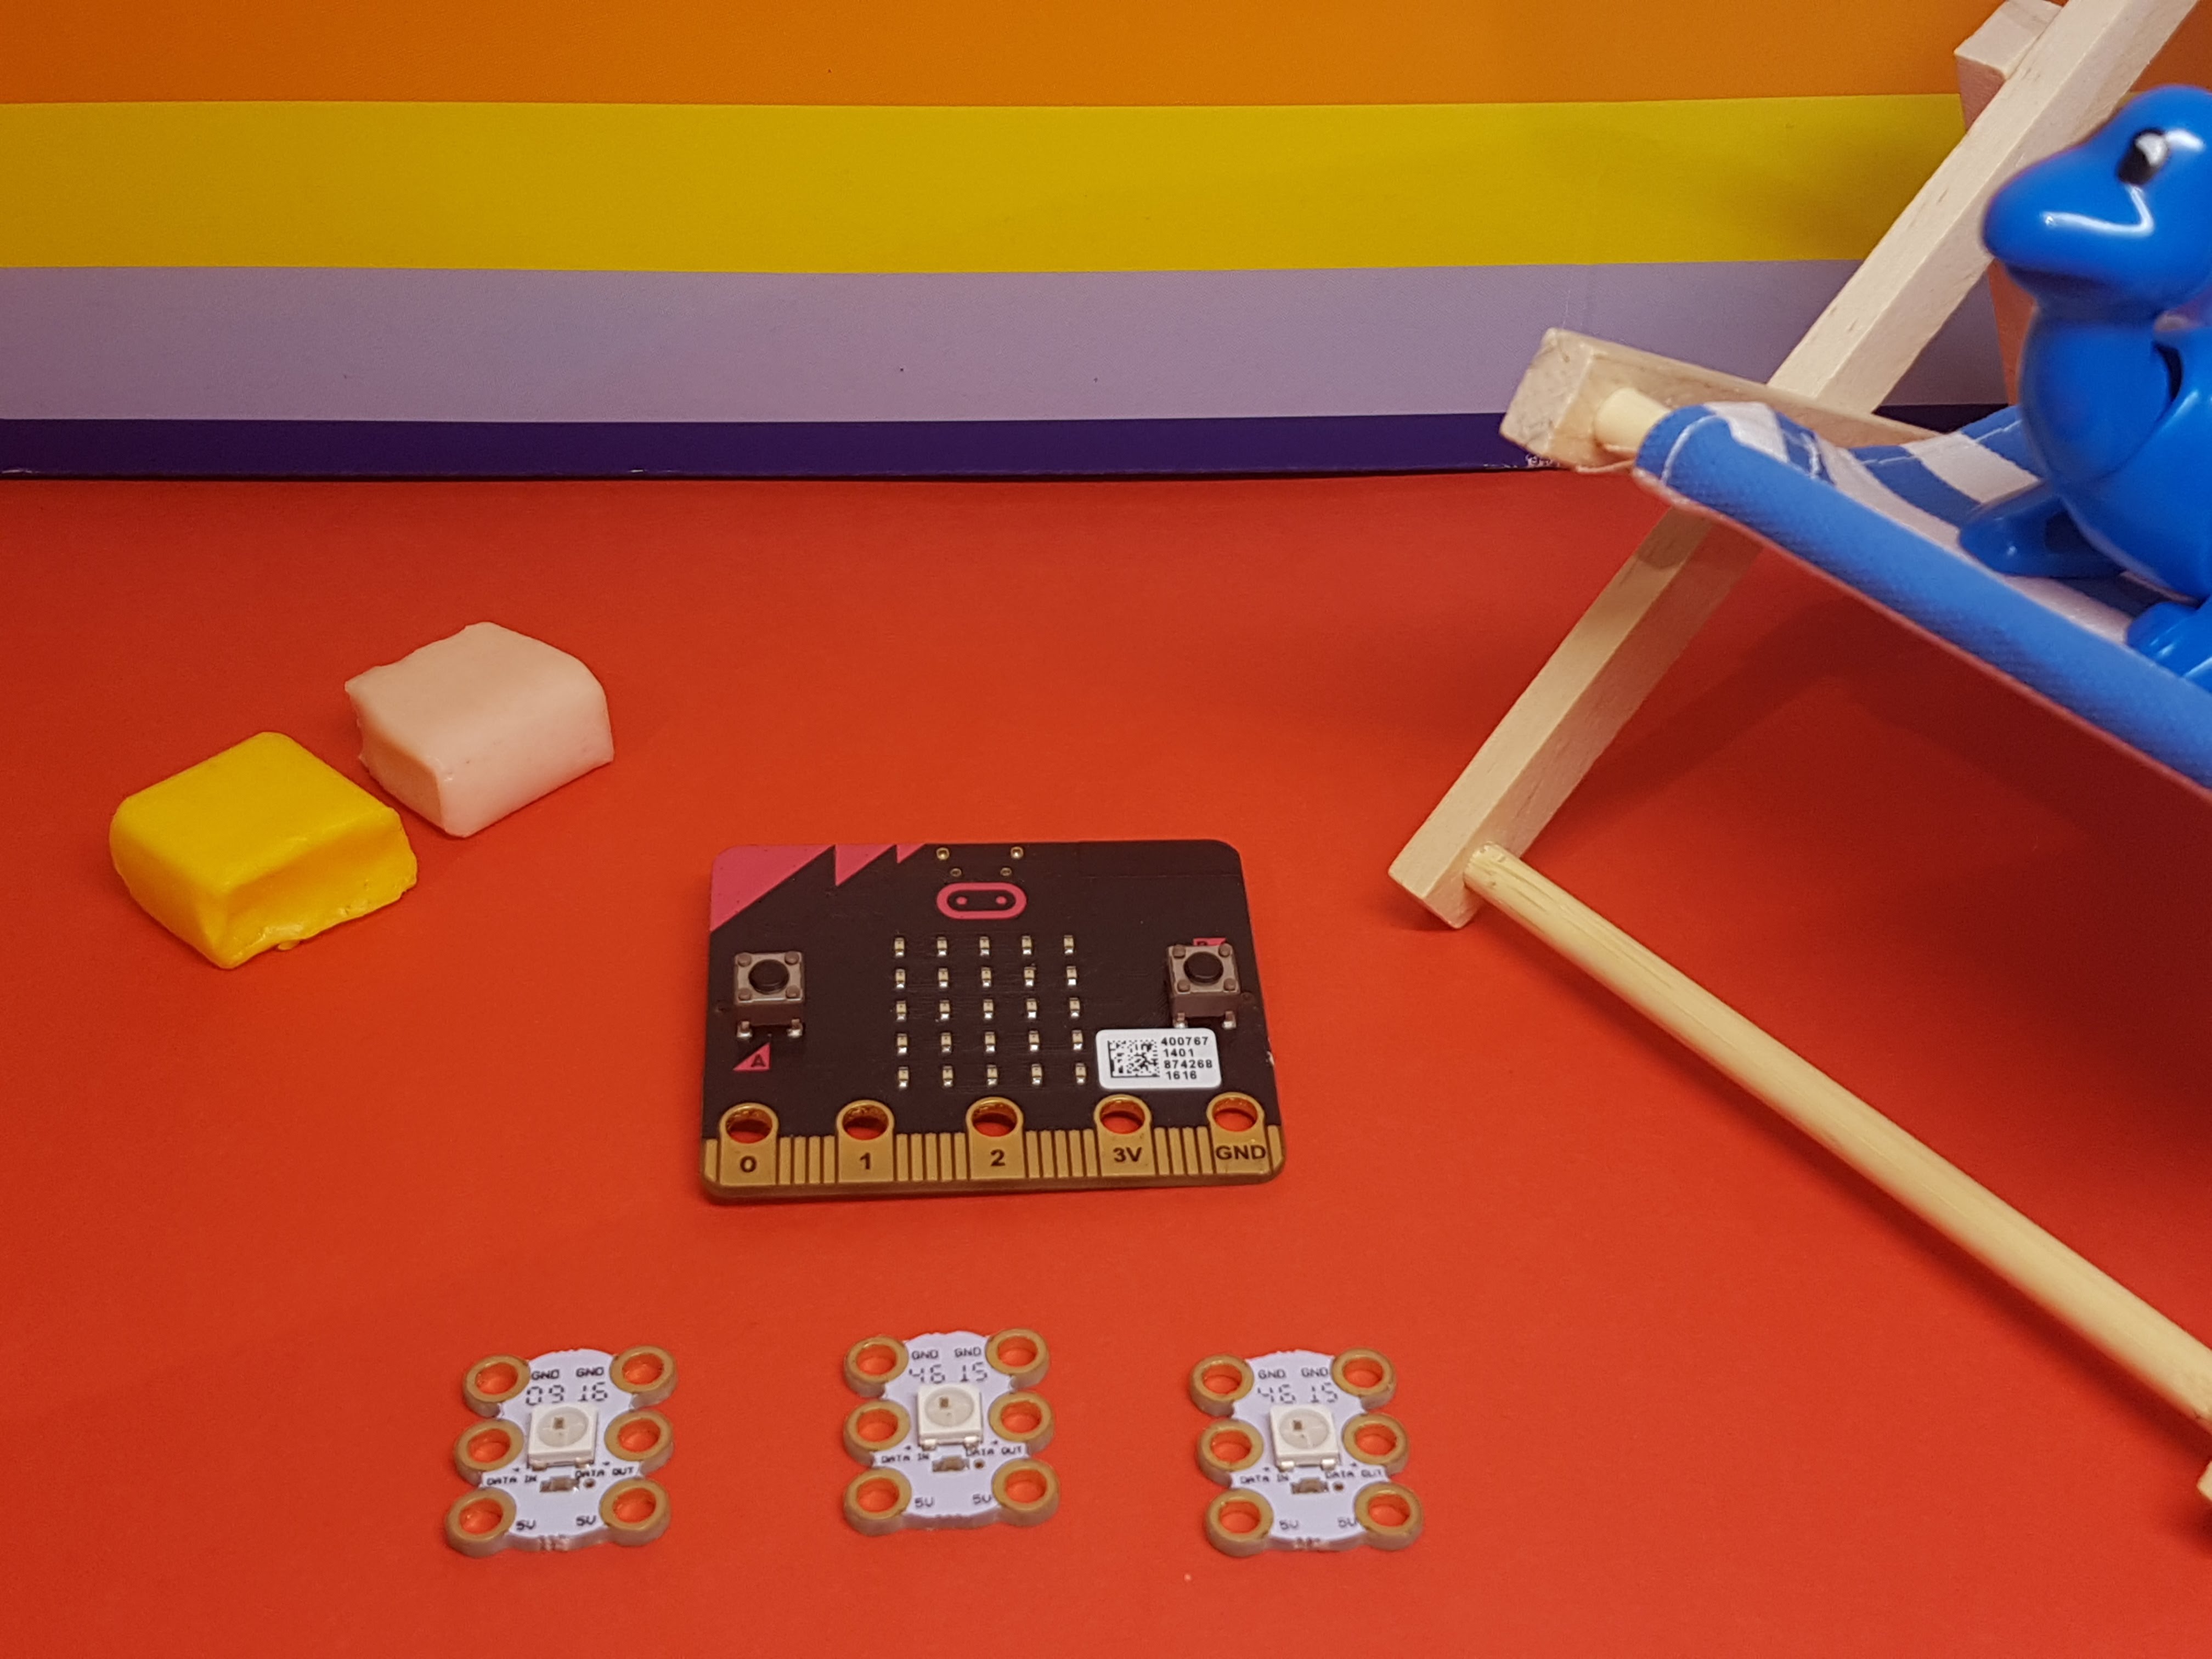
Equipment
- A glass jar (I bought from St John’s Hospice charity shop for 50p)
- Some bubble wrap
- micro:bit
- 1 x CodeBug GlowBug http://www.codebug.org.uk/shop/
- 3 x crocodile clips, preferably white.
Build
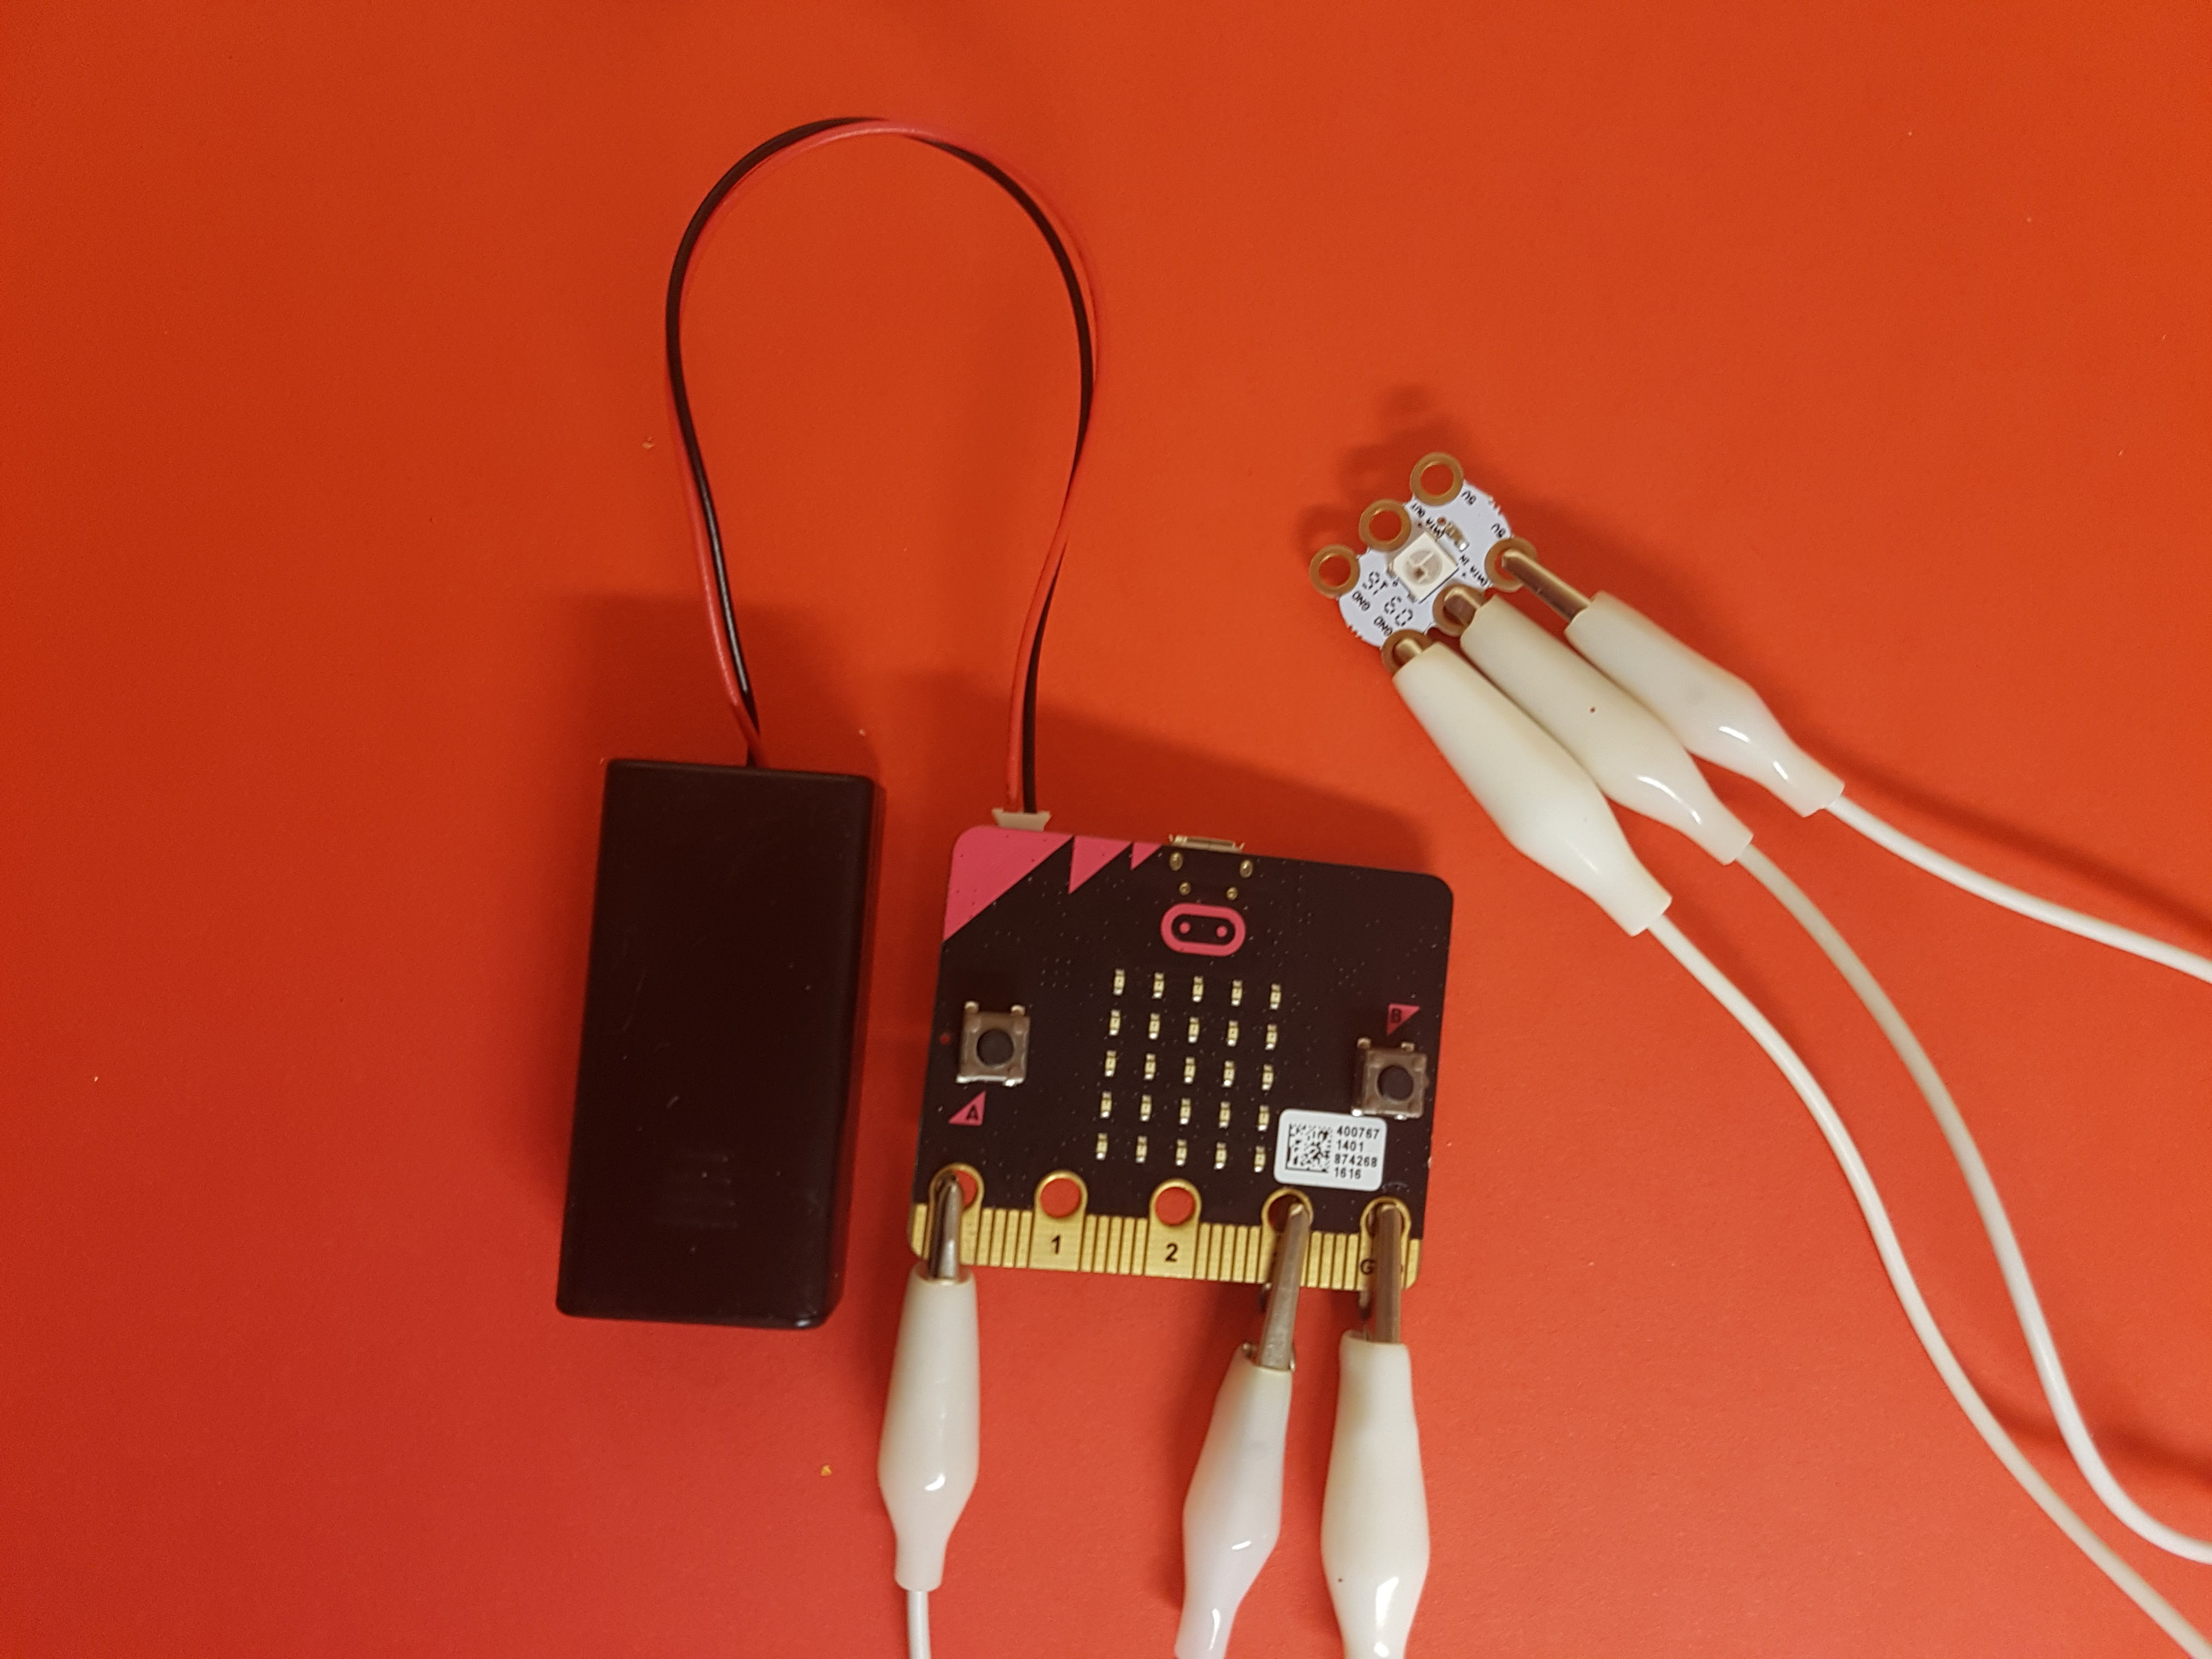
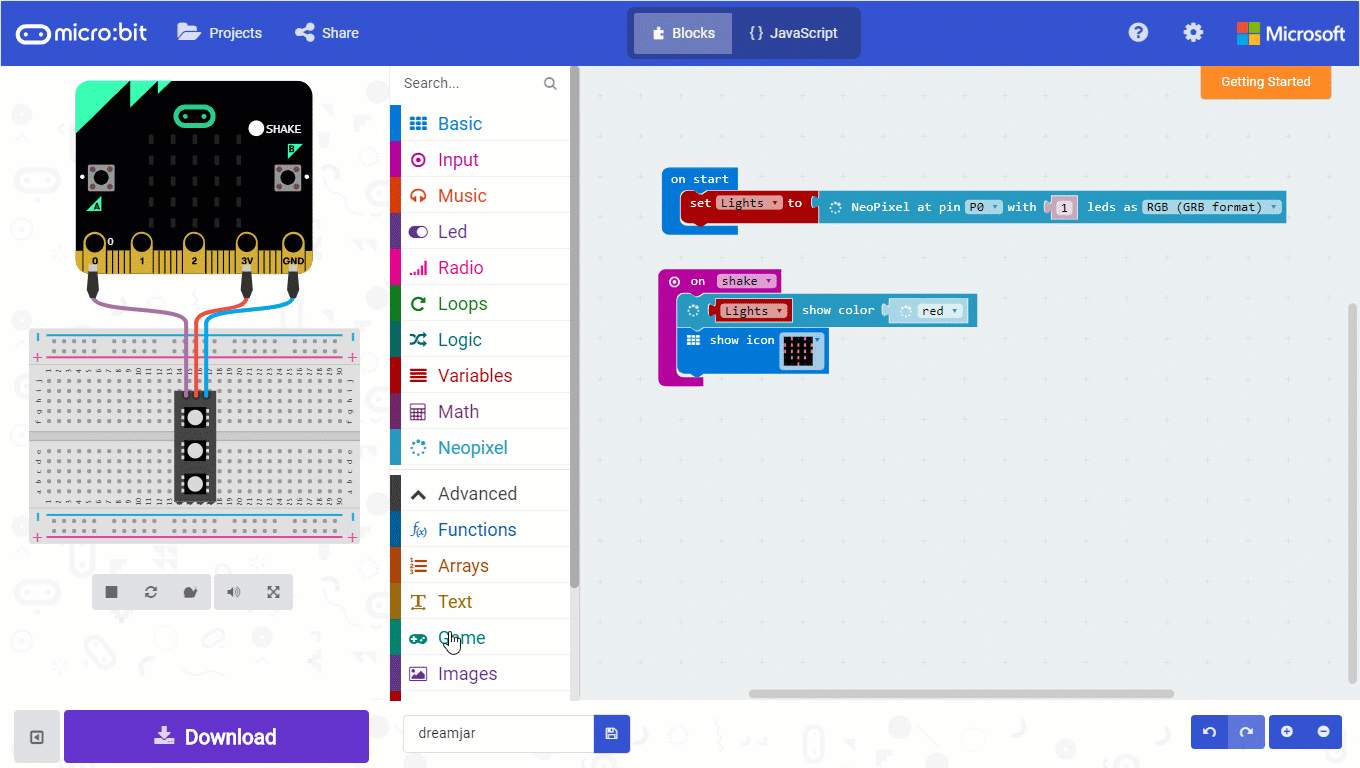
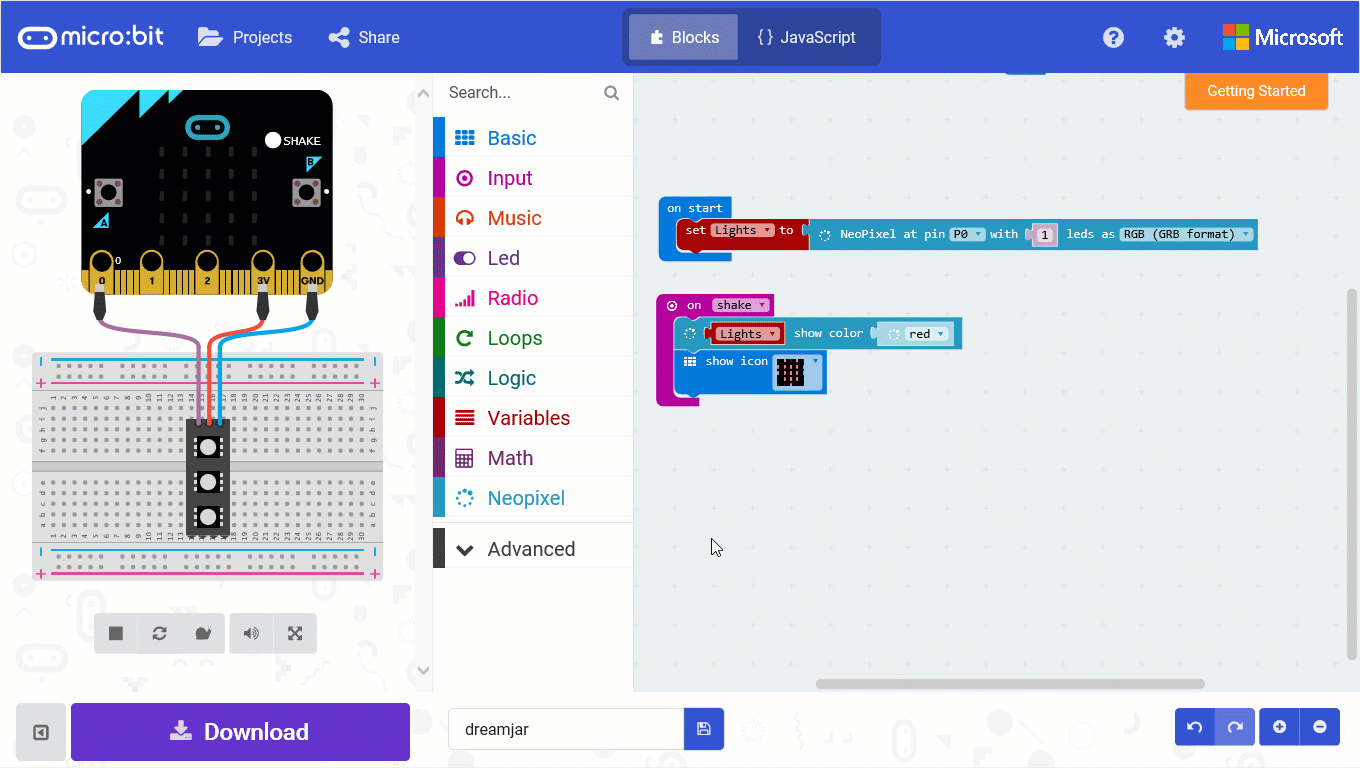
- Connect the crocodile clips from the micro:bit to the GlowBug
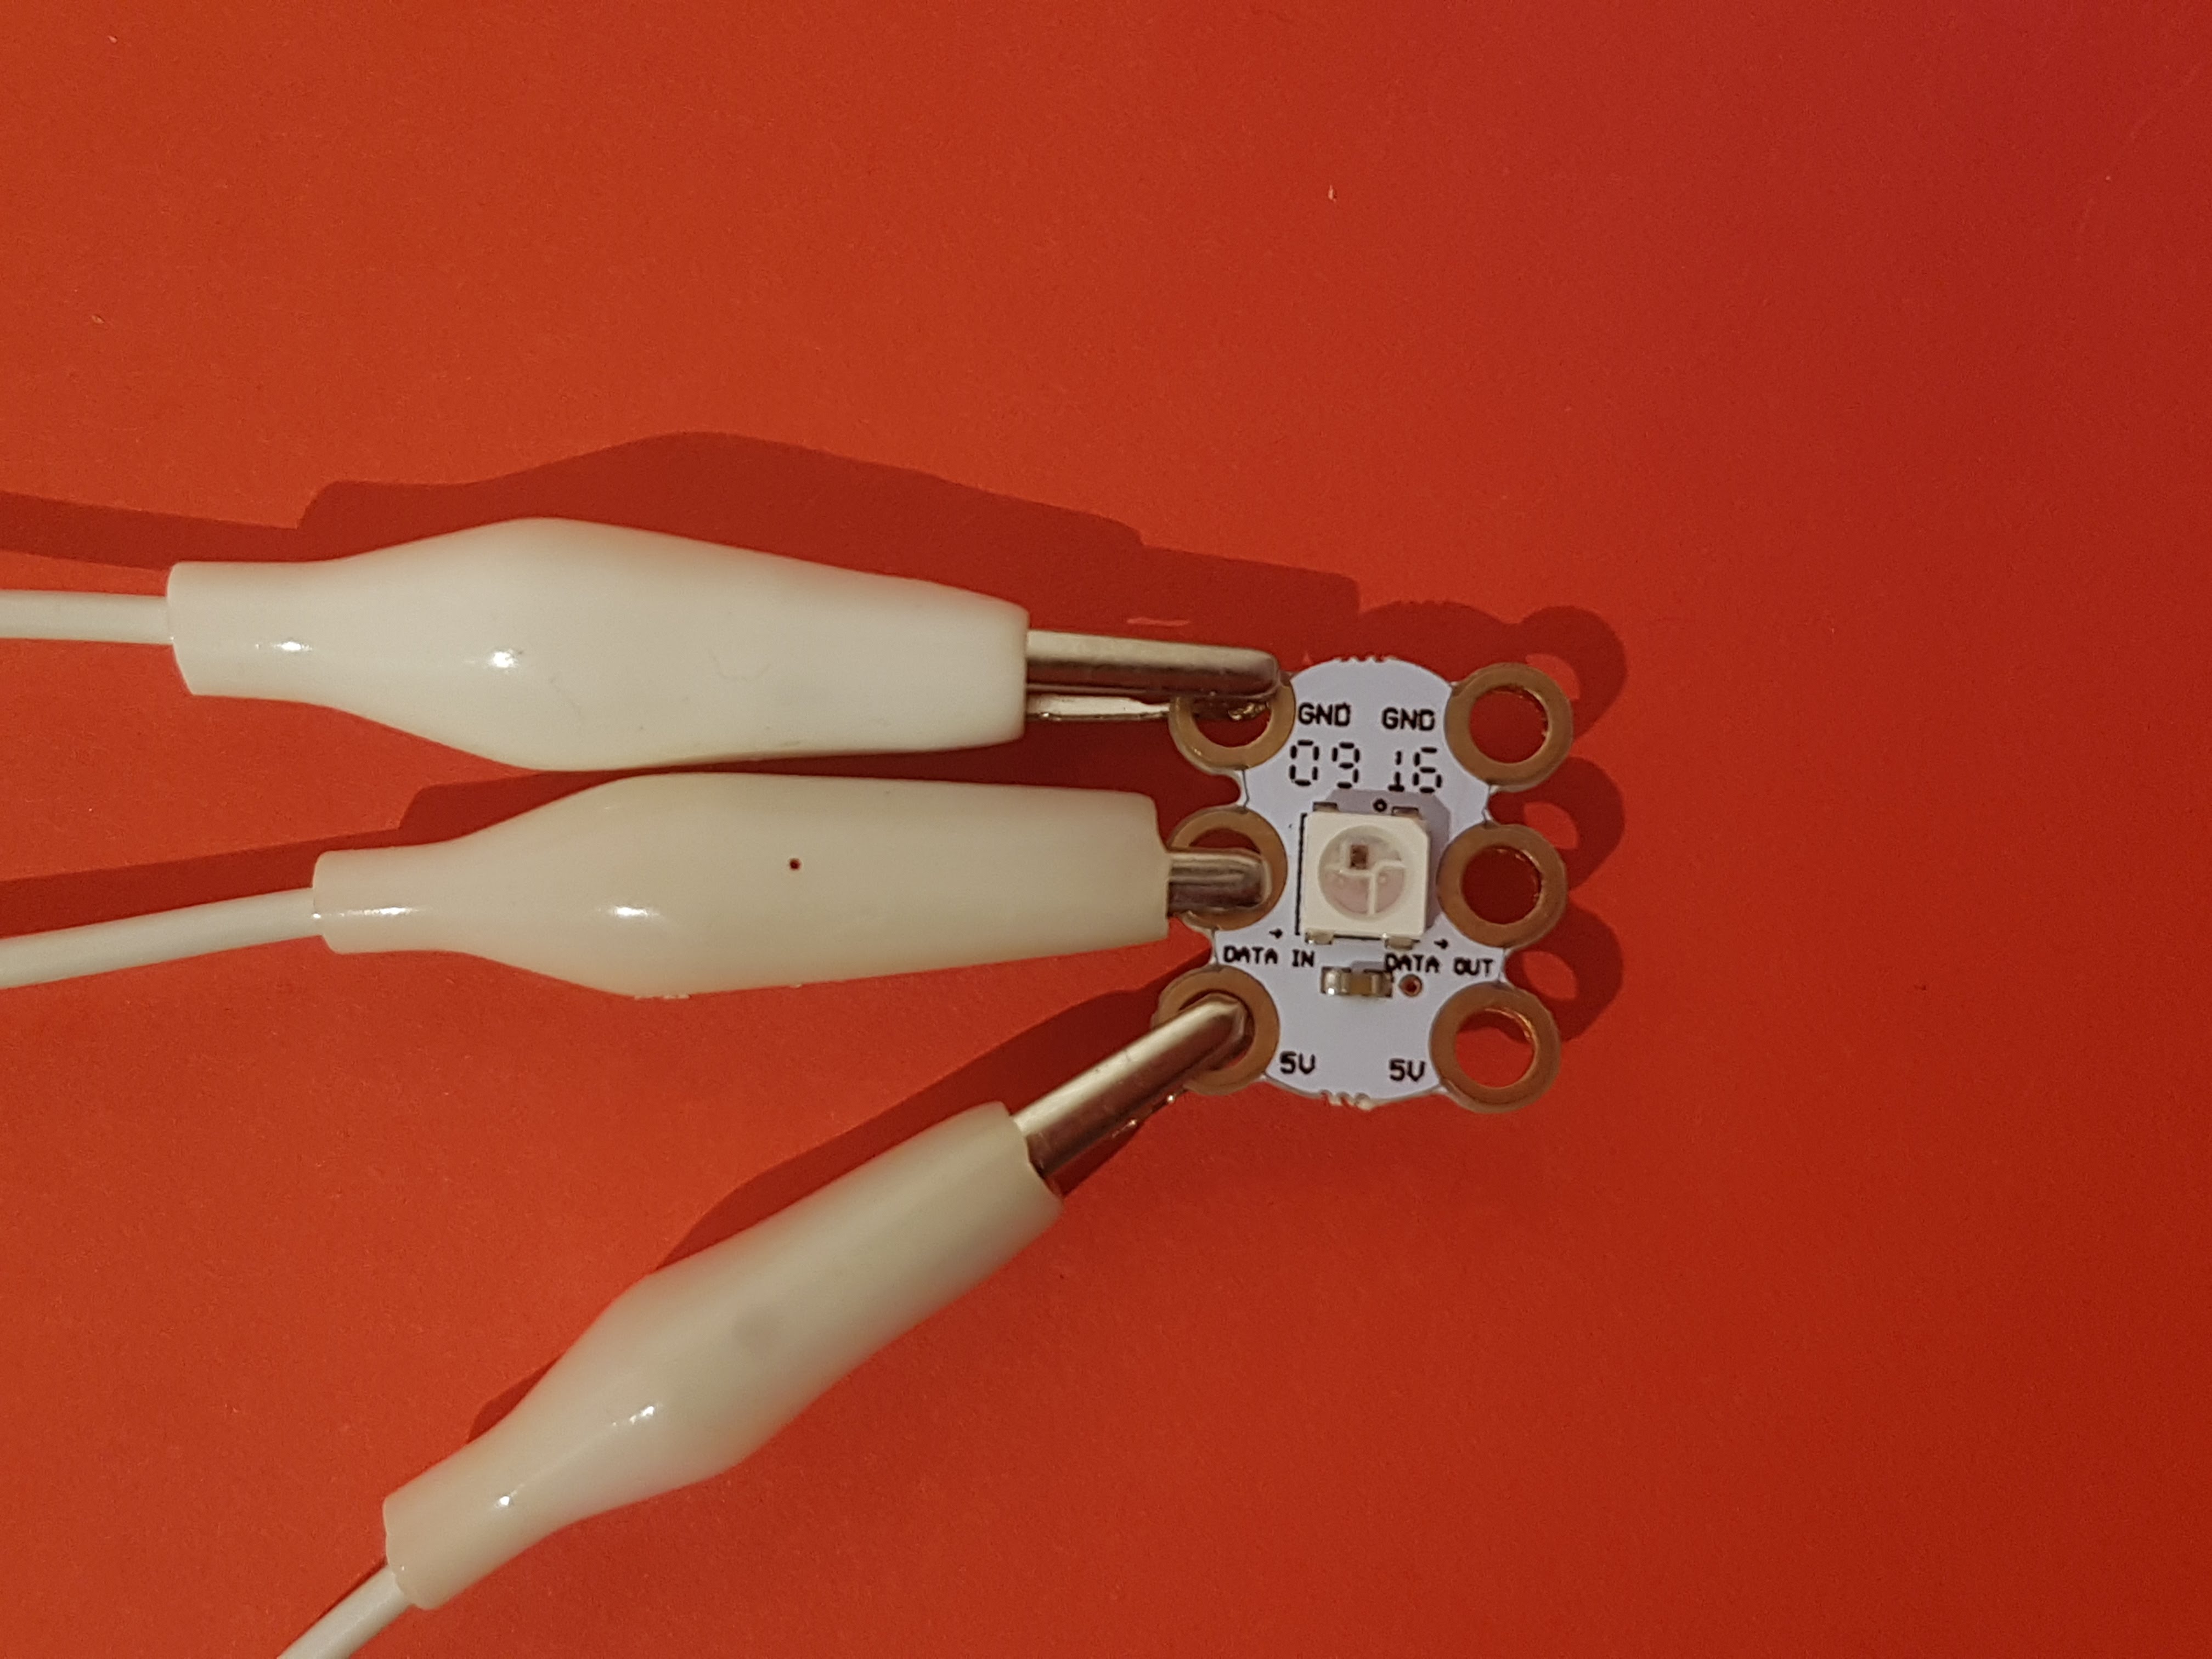
| micro:bit | Glow Bug |
|---|---|
| GND | GND |
| 3V | 5V |
| 0 | DIN |
The micro:bit can power 5V lights with its 3V pin. It can power up to 8 of them
Code
Add the Neopixel package
Before putting everything in the jar, let's code it!
- Go to microbit.makecode.com
- Add the Neopixel package
- Select Advanced
- Select Add Package
- Select Neopixel
![]()
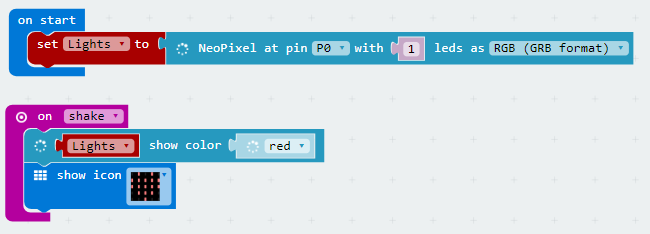
Setup the lights
- Create a variable called lights
- Select Variable
- Select Create New Variable
- Type "Lights"
- Select OK
- From the Variables menu drag out "Set item to 0"
- Connect it under "On start"
- Change item to Lights
- From the Neopixel menu select the first block "Neopixel at pin 0.."
- Drag this out onto 0
- Change 24 leds to 1
![]()
Turn the lights on
- From Input select "on shake" and drag it onto the screen
- From Neopixel select "item show color red" and place it under on shake
- Change item to lights
- Change red to whatever colour you want
- Add a test block to make sure Shake has happened: select Basic
- Select "show icon" and choose an icon
- Put it in "On shake"
Download and test the code
- Plug in your micro:bit
- Select Download
- In Chrome the file will go to your Downloads folder. Go to your Downloads folder and drag your file onto the micro:bit
- In Internet Explorer it will ask you where to save your file to. Select "Save As" then select the micro:bit
- In Chrome the file will go to your Downloads folder. Go to your Downloads folder and drag your file onto the micro:bit
- Shake your micro:bit
- Ta-da!
Troubleshooting
Plug the micro:bit into your computer using a USB cable then shake it - did it work?
1. Yes: Your battery pack isn't working - does it have an on/off switch? Does it need new batteries?
2. No:
1. Check your code - have you changed item to lights?
2. Check the connections from your GlowBug to your micro:bit. With the same colour crocodile clips it's very easy to get them mixed up.
Finish Assembly
Now your micro:bit is coded:
- Secure the crocodile clips onto the micro:bit using tape
- Plug the battery pack into the micro:bit
- Wrap the micro:bit and battery pack in bubble wrap
- Line the jar with bubble wrap
- Place the micro:bit in the jar
- Put some bubble wrap in the jar
- Place the light in the jar
- Put some more bubble wrap in the jar
- Test your setup to make sure it still works!
More Code
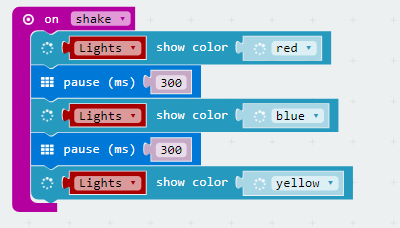
You can change the lights to lots of different colours, just add a pause between every time you "show color", e.g.
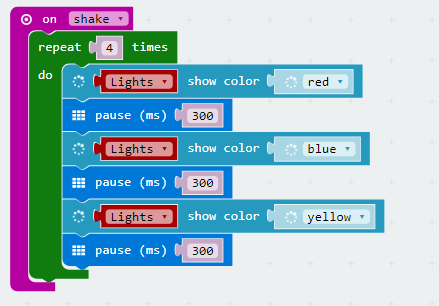
Or use loops to keep changing the lights over and over again
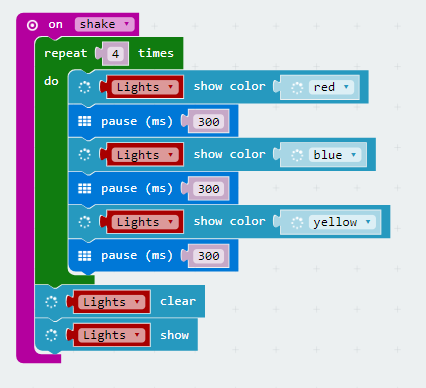
To turn off the lights you need to use lights clear followed by lights show:
What pattern are your dreams going to show? What does a nightmare look like?