Raspberry Pi Intercom System
**Updates: 27th March 2020. **
I made this for a lovely friend. She wanted an intercom system between her and her two children's bedroom.
What is it?
This is an intercom system from the sitting room to bedroom1 and bedroom2. The sitting room can talk to bedroom1 or bedroom2 or both. Bedroom1 and bedroom2 can talk to the sitting room, but they can't talk to each other.
What do I need?
3 x Raspberry Pi (not the zero) with internet
3 x 8GB micro SD cards (£4.74, https://cpc.farnell.com/integral/inmsdh8g10-90sptab/8gb-microsdhc-smartphone-tablet/dp/MD00983)
3 x USB audio adaptors (£5) https://thepihut.com/products/usb-audio-adapter
3 x 3.5mm jack microphones (£2.99, https://www.amazon.co.uk/dp/B005BOU51Y/ref=pe_385721_37038051_TE_3p_dp_1)
3 x 3.5mm jack speakers (Look in poundland?)
4 x buttons (£1.25 https://shop.pimoroni.com/products/mini-arcade-buttons?variant=40377171274)
8 x jumper wires
8 x spade connectors
Assemble the sound and microphone
On your Raspberry Pis connect the microphone and the speaker to the audio adapter
The default is for the speaker to be connected to the 3.5mm jack. If your speaker is connected via USB then you need to tell the pi that. Type
sudo nano /usr/share/alsa/alsa.conf
and change these values from 0 to 1
defaults.ctl.card 1
defaults.pcm.card 1
Test the sound is working by downloading a wav file and playing it
sudo wget 'http://soundbible.com/grab.php?id=1577&type=wav' -O siren.wav
aplay siren.wav
If you hear nothing type
alsamixer
and check the volume on the speaker and the microphone.
Test the microphone by typing
arecord test1.wav
Speak into the microphone then press ctrl and C to stop recording
Use aplay to test it worked
aplay test1.wav
Setup the software
- Setup the Raspberry Pis. Install Raspian onto them and connect them to your network. I've gone for an older version of Raspian: 2019-04-08-raspbian-stretch.zip from here http://mirror.ossplanet.net/raspbian-downloads/raspbian/images/raspbian-2019-04-09/
- Label your Raspberry Pis so you don't mix them up! Also give them unique host names on your network. I've gone with SittingRoom, Bedroom1, Bedroom2

Install mumble server
We're going to install the mumble server on the sitting room pi. This hosts the system, clients (the bedrooms) will connect to this pi.
- Run
sudo apt-get update
- Install the mumble server
sudo apt-get install mumble-server
- Type this command to change some settings
sudo dpkg-reconfigure mumble-server
Autostart: Yes
High Priority: Yes
SuperUser: Set a password here
- Change some more settings
sudo nano /etc/mumble-server.ini
Change welcomeText if you want
Set serverpassword so anyone who wants to join your intercom needs a password
Uncomment registerName and change it to your house name
- Restart the server
sudo /etc/init.d/mumble-server restart
This Raspberry Pi hosts the whole intercom system.
Install a test mumble client
On your laptop, install a mumble client to test the server
- Download and install Mumble Client https://www.mumble.com/mumble-download.php
- Select Server > Connect
- Select Add New
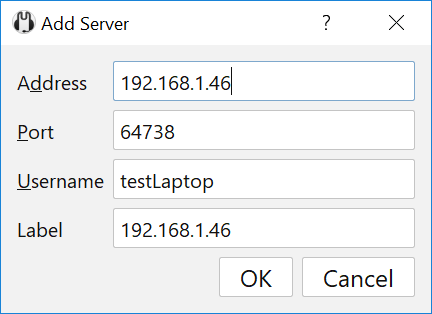
- Enter anything into username
- Enter the address of the SittingRoom pi into Address, mine is 192.168.1.46
- Leave port as it is
- Select OK
- Select Connect
- The first time you connect you might get a warning, select Yes to accept the certificate
- A warning appears:
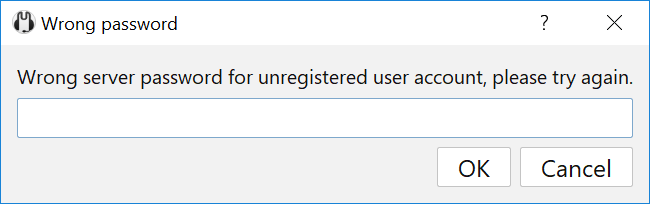
- Enter the password you entered for the serverpassword in step 4 in the last section
- You should now be connected to your SittingRoom server
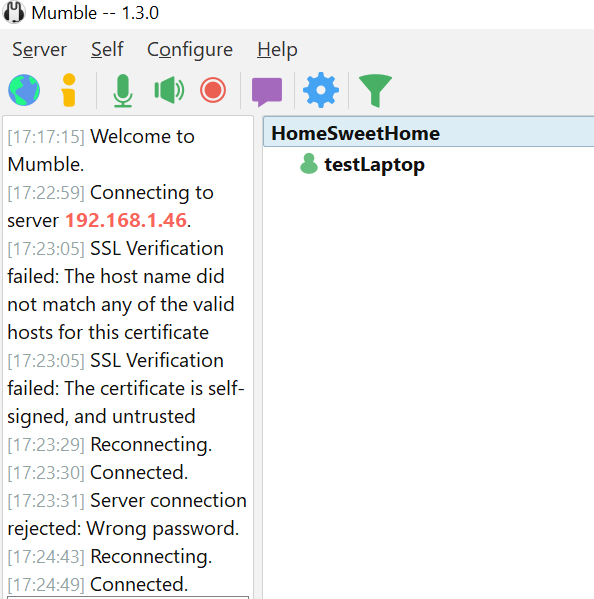
The server is working, we can connect to it. We can't talk to anyone on the server yet cause no one else is there.
You could get another laptop to connect or even a phone. There are some free mumble apps out there. When two devices are connected it’s like having an open line between the two devices. You might want to get someone in a different room to test out the second device or you’ll get lots of feedback!
We want to create two channels on the server. This is so we can take to Bedroom1 on its own and Bedroom2 on its own as well as both together. It's easier to create channels on a laptop.
- Open Mumble
- Select Server > Connect
- Right click on the Sitting Room Server and select Edit
- Enter SuperUser as the username, a password box will appear
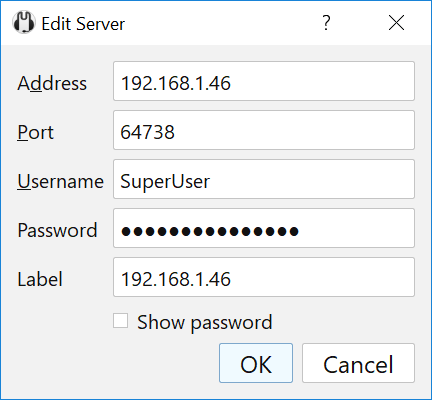
5. Enter the SuperUser password
6. Connect
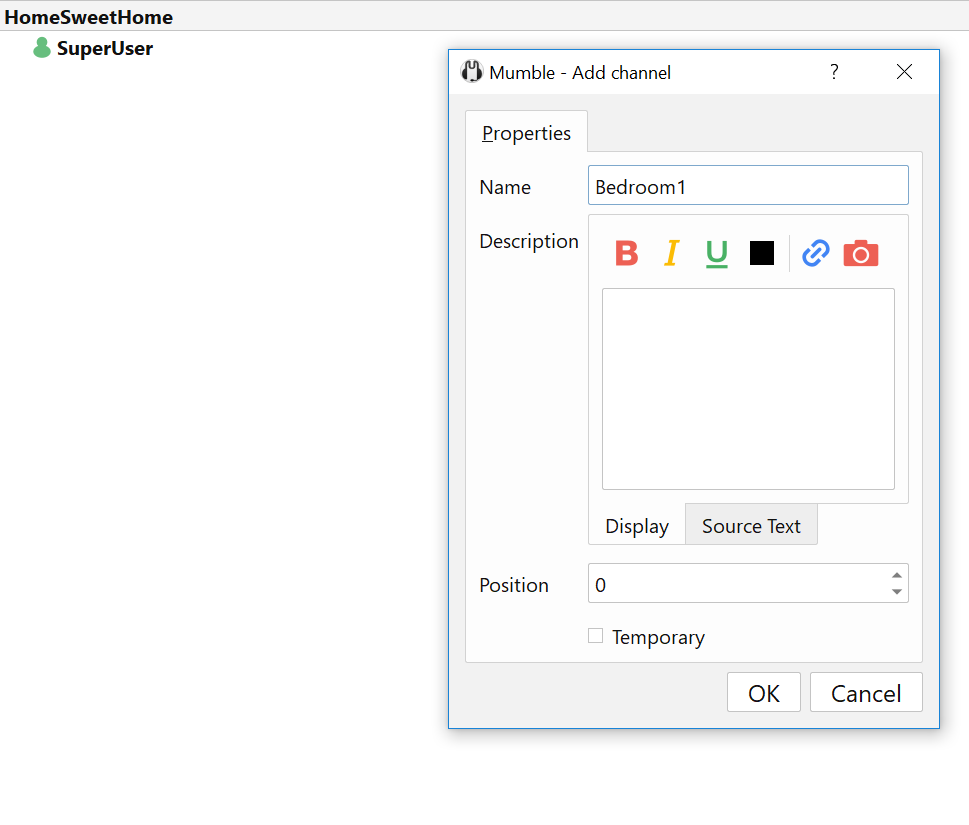
7. Right click on the server name and select Add
8. Give the channel a name: Bedroom1
9. Create another channel called Bedroom2
We now have a server with two channels:

Connect the Raspberry Pi Clients
We know the server is working and clients can connect to it. We now need to connect the Raspberry Pi clients to the server and the channels.
Install TalkiePi
We're following these instructions
https://github.com/dchote/talkiepi/blob/master/doc/README.md
Create a mumble user
sudo adduser --disabled-password --disabled-login --gecos "" mumble
sudo usermod -a -G cdrom,audio,video,plugdev,users,dialout,dip,input,gpio mumble
Install talkiepi and other stuff
Install the go language
sudo apt-get install golang libopenal-dev libopus-dev git
Change to user mumble and make new directories
sudo su mumble
mkdir ~/gocode
mkdir ~/bin
export GOPATH=/home/mumble/gocode
export GOBIN=/home/mumble/bin
cd $GOPATH
Get the code from github
go get github.com/dchote/gopus
go get github.com/dchote/talkiepi
Compile
cd $GOPATH/src/github.com/dchote/talkiepi
go build -o /home/mumble/bin/talkiepi cmd/talkiepi/main.go
Exit mumble and add it as a service
exit
sudo cp /home/mumble/gocode/src/github.com/dchote/talkiepi/conf/systemd/mumble.service /etc/systemd/system/mumble.service
sudo systemctl enable mumble.service
Run mumble client
We're going to connect to the channel Bedroom2. You need to know the server's IP address. Mine is 192.168.1.46
sudo /home/mumble/bin/talkiepi –server 192.168.1.46:64738 –password mumble –username Bedroom2Here -channel Bedroom2
If that doen't work try
go run cmd/talkiepi/main.go –server 192.168.1.46:64738 –password mumble –username Bedroom2Here -channel Bedroom2
Test the setup
Test your setup by talking from your laptop to your Raspberry Pi and vice versa. On the Raspberry Pi you'll need to add a button to GPIO 25 and Ground. Press the button to talk back to the server.
Setup the 2nd bedroom
Follow the steps above with the final step to be
sudo /home/mumble/bin/talkiepi –server 192.168.1.46:64738 –password mumble –username Bedroom1Here -channel Bedroom1
or
go run cmd/talkiepi/main.go –server 192.168.1.46:64738 –password mumble –username Bedroom1Here -channel Bedroom1
Setup the Server as a Client
You should now have 3 raspberry pis
- One is the server, in my case, 192.168.1.46
- One is a client, bedroom1
- One is a client, bedroom2
You could just have your laptop talking to the raspberry pis in bedroom1 and bedroom2. Or you could setup a raspberry pi with two buttons that talks to the bedrooms.
For this, we're going to use the server. We need to setup two clients on the server.
Follow the steps to create a client on a raspberry pi from above with the final step to be
sudo /home/mumble/bin/talkiepi –server 192.0.0.1:64738 –password mumble –username SittingRoomToBedroom2 -channel Bedroom2 &
I changed the server address to be 192.0.0.1 which means this local raspberry pi, cause that's where our server is.
I want to run another instance of talkiepi again but we don't want to have it reacting on the same button press.
Change the button press for the 2nd instance
cd ../mumble/bin/
sudo cp talkiepi talkiepiA
talkiepiA has the original settings.
nano gocode/src/github.com/dchote/talkiepi/talkiepi.go
In this line
ButtonPin uint = 25
Change 25 to 17
Save and exit changes
Now the button is set, rebuild the talkiepi instance.
Create the GOPATH again
export GOPATH=/home/mumble/gocode
export GOBIN=/home/mumble/bin
cd $GOPATH
cd $GOPATH/src/github.com/dchote/talkiepi
Build the code again
go build -o /home/mumble/bin/talkiepi cmd/talkiepi/main.go
Run the new instance, notice how we're running talkiepiA
sudo /home/mumble/bin/talkiepiA –server 192.168.1.46:64738 –password mumble –username SittingRoomToBed1 -channel Bedroom1
When you press the button attached to GPIO17 it should speak to Bedroom1
When you press the button attached to GPIO25 it should speak to Bedroom2
Test, test and test again! You might need some nice family members in different rooms to help you test this project. Feedback can be a problem!